

Training - Tactics and Troubleshooting, Taser Intl, 2001
Download original document:
Document text
Document text
This text is machine-read, and may contain errors. Check the original document to verify accuracy.
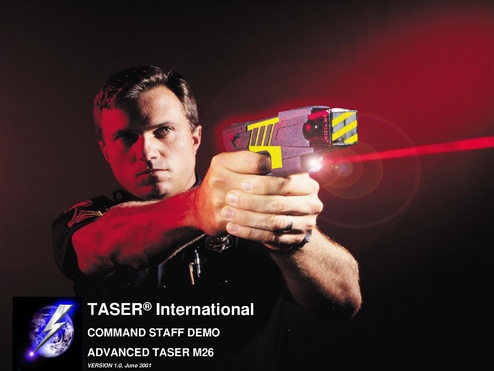
TASER® International
COMMAND STAFF DEMO
ADVANCED TASER M26
VERSION 1.0, June 2001
ADVANCED TASER
(Click in area above to start video)
REDUCE OFFICER AND
SUSPECT INJURIES
BY STOPPING THREATS
FROM A SAFE DISTANCE
Example: Orange County, FL Sheriff’s Dept
Injuries to Deputies Dropped by 80% After
Deploying the M26*
*Source: “TASER Works, so its use increases,” Ripple, Amy C., Orlando Sentinel, July 29, 2002
DESIGNED TO FILL
THE VOID BETWEEN
HANDS ON
AND
OC SPRAY
MYTHS & URBAN
LEGENDS
ÞRodney King
¾ Not the same weapon used in that incident
¾ Earlier 7-Watt system of another mfg.
ÞWill not cause heart or pacemaker
failure.
ÞWill not cause defecation or urination
ADVANCED TASER M-26
Constructed of impact resistant sonic welded polymer.
Ai Cartridge
Laser Sight
Batte ry Indicatolr
~ Battery
Cov,er
Dataport
Battery Cover Pin
How The TASER Works
• Utilizes 8 “AA” batteries
• Generates 50,000 Volts and 26
Watts of electricity (0.162 Amps)
• Achieves EMD to incapacitate the
subject in 0.5 to 1.5 seconds
• Cycles for 5 seconds
Stun vs. EMD
(Click on image above to start video)
NOTE: The subjects above are extremely focused defensive tactics instructors. They were given a goal to
turn around and get to the instructor. This video demonstrates the effects of the EMD system even on these
elite individuals. Note that the stun can be overcome and that the EMD overwhelms the ability to conduct
coordinated action.
Weapon Management Technologies
.........
Tll··UJ
A.",
1\
~:llIJ
I
-un
,"
,11.0
,
••1
~.".
01••1
I MUll
tn ••
r
..alti ...
nAlw·.
'I'""
• Dataport
• AFID ID Tags
– 20-40 fired with each
cartridge
– Allows tracking of
which officer
discharged weapon
– Stores time and date of each
firing (last 585)
– Protects officers from unfounded
allegations
– Officers accountable for use
– Allows remote firing from robots
Automatic Timing Cycle
• Window of opportunity!
• Increases effectiveness and stops accidental
trigger release
– 5-second discharge
– Can be reactivated by simply depressing the
trigger after each 5-second discharge
Medical Safety
(8)
<"
E
10 100----------------=
lI)
...E
•
UL Limit for Ventricular Fibrillation (US)
IEC 479 Threshold for Ventricular Fibrillation (Europe)
ADVANCED TASER M26
AIR TASER 34000
...-..
'"-"
t: 10 ~-- - - - - - - - - - - - - - - "
~
L.
~
U
~ 102b---------~~=..::..------------~
o
CO
•
1O"""'""-....a........I..............LI.I.I.a--a-.a--............-....
- -..............1--.....
-01--......-.....
- -. ....- ~ 6
5
10.
10.
10-4
10.3
Pulse Width (s)
..............~_.a--a.-a..........
- -......
--
10.2
10.1
Medical Finding
Heart/Drugs/Pacemakers
• Heart Failure: The Univ. of Missouri tested the 26Watt ADVANCED TASER M26 applied directly to the
chest of test animals.
• Using “worst case” scenarios, tests found the M26
caused no interference with the heart rhythms -- even
when the animal subjects were given drugs
(epinephrine & others similar to PCP & cocaine)
which make the heart more susceptible to electrical
stimulation.
• Pacemakers are designed to withstand 100’s of times
more electrical power.
Comparison of Injuries
TASER Technology Reduces Injuries
80%
78%
78%
80%
70%
60%
Suspect
Injured
60%
50%
45%
36%
29%
29%
30%
20%
21%
16%
20%
18%
11%
10%
Chemical
Spray
Kick
Misc. body
force
Baton
Punch
Flashlight
0%
Sw arm
5%
0% 0%
Officer
Injured /
Affected
TASER
40%
Force Type
Source: Study of Use of Force at Los Angeles Police Department, Greg Meyer. Statistics are for
7-Watt TASER technology deployed at LAPD.
Original Study Available at http://home.earthlink.net/~gregmeyer/injury.html on the internet.
RCMP Testing of M26
Pain versus incapacitation
(Click in area above to start video)
Aftereffects
•
•
•
•
•
•
•
Dazed for several minutes
Involuntary muscle contractions
Disorientation / Vertigo
Critical response amnesia possible
Temporary tingling sensation
No permanent injuries
Medical treatment may be required for probe
removal or subsequent injuries due to falls
Los Angeles Sheriffs
Analysis of Potential Savings
•Los Angeles Sheriff’s Deputy Mike Harding
compared 3 liability cases prior to M26
deployment with actual field uses
•Conclusion: Had the M26 been available in
these three cases, injuries and death to the
subject may have been averted.
Potential liability savings:
$2,500,000
Proven Success
Use-of-force breakdown for the
Orange County Sheriff's Office (Florida)
Chemical force
Physical force
Firearms
K9
Impact weapons
Impact
munitions
Taser
Total*
1999
300
78
5
62
27
0
2000
263
75
13
60
21
1
2001
221
52
4
48
13
2
2002**
64
29
0
29
5
0
Down 79%
Down 63%
Down 78%
Down 53%
Down 81%
-
0
410
3
383
228
527
201
295
68% of all force
295
NOTE: Impact weapons include batons, nightsticks and truncheons.
Impact munitions include bean-bag rounds.
* The total can include more than one type of force used during an incident.
** Reports filed through Friday.
SOURCE: Orange County Sheriff's Office
Are there any
Questions?
Chief Instructor Hans Marrero and
Steve Tuttle, Director of Gov’t & Law Enforcement
DID WE ACCOMPLISH OUR
MISSION TO:
“REDUCE OFFICER AND
SUSPECT INJURIES BY
STOPPING THREATS FROM
A SAFE DISTANCE?”
Success Percent by
Level of Firing
Total number of reports
448
Percent Successful:
93.08%
_________________________________________
Darts Fired at Subject:
257
92.61%
Laser Only:
100
98.00%
Spark Demo
13
100%
Stun Gun Application
69
85.51%
Out of Events 439
Distance of Firings
1-3 Feet
3-7 Feet
7-11 Feet
11-15 Feet
16-21 Feet
21
90
89
47
1
8.43%
36.29%
35.88%
18.95%
.04%
Some of this information was not provided
and will not add up to 257 (248).
Success Percent by
Distance of Firing
Distance
# of Incidents
Success Rate
1-3 Feet:
22
95.45%
3-7 Feet:
92
95.65%
7-11 Feet:
91
91.21%
11-15 Feet:
52
90.38%
15-21 Feet:
5
100.00%
* The total number may vary from the other slides as this data query
was run at a later date, with a larger number of uses in the database.
Length of discharge
1 seconds
1
2 seconds
8
3 seconds
11
4 seconds
3
5 seconds
103
More than 1 cycle
99
Number of probes that
hit the suspect
1 Probe Hit
2
2 Probe Hit
60
3 Probe Hit
5
4 Probe Hit
1
Type of Incident Involving
the Use of M26
Officer Assault
Warrant Service
Civil Disturbance
Barricaded
Suicidal
Resisting Arrest
Violent
3.35%
5.36%
6.70%
8.71%
20.98%
41.29%
44.42%
There is more than 100% as each event may involve one or more types of incident
Threats Involved
Deadly Assault
2.68%
Defensive Resist
9.82%
Active Aggression 23.21%
Verbally Non-Comp 31.03%
Total Incidents
448
This was the most heavily “edited” section and required thorough followup.
Types of Weapons Used
by Suspects
Blunt Weapon
2.23%
Firearm
4.02%
Edged Weapon
13.84%
Suspect’s Influence
PCP
Misc. Drugs
Cocaine
Meth
EDP
Alcohol
1.34%
3.13%
5.58%
6.03%
34.15%
42.86%
Type of Incident Involving
the Use of M26
Officer Assault
Warrant Service
Civil Disturbance
Barricaded
Suicidal
Resisting Arrest
Violent
3.35%
5.36%
6.70%
8.71%
20.98%
41.29%
44.42%
There is more than 100% as each event may involve one or more types of incident
Failures in Stun Gun Mode
Low Nerve/Muscle
Miss
Single Dart
Weapon Problem
9
2
1
4
56.25%
12.50%
6.25%
25.00%
Note, this includes all failures. For example, the probes may have been
fired, and missed, but then the stun gun was applied.
Failures when Darts Deploy
Door Closed
Dropped/Broken
Low Battery
Unknown
Weapon Problem
Cartridge Failure
Miss
Propped Up
Operator Error
Single Dart
Low Nerve/Muscle
Clothing
1
1
1
1
1
2
2
2
4
5
7
15
2.38%
2.38%
2.38%
2.38%
2.38%
4.76%
4.76%
4.76%
9.52%
11.90%
16.67%
35.71%
Total of All Failures
Door Closed on Wires
Low Battery
Unknown
Decided Not to Use
Cartridge Failure
Dropped/Broken
Propped Up
Miss
Operator Error
Weapon Problem
Single Dart
Clothing
Low Nerve/Muscle
1
1
1
1
2
2
2
4
4
5
6
15
16
1.67%
1.67%
1.67%
1.67%
3.33%
3.33%
3.33%
6.67%
6.67%
8.33%
10.00%
25.00%
26.66%
Location of Use
Indoor
Jail / Hospital
or
Indoor + Jails
125 29.76%
82 19.52%
Outdoor
213 50.71%
207 49.29%
This represents 420 events (some reports did not disclose location)
Injuries to Suspects
Minor
56
13.56%
(Puncture wounds from probes & misc. cuts)
Moderate
5
1.21%
(Abrasion, skinned knee, carpet burn, testicle shot,
penis shot, cut to mouth, cuts from falling onto glass)
Severe
3
0. 73%
(Dog bites, self-infliction, officer battle)
None
349
84.50%
Injuries to Officers
Minor
20
4.76%
(Officers involved with fighting suspects or arresting
them)
Moderate
1
0.23%
(Knife thrown at officer cutting arm)
Severe
0
0%
None
399
95%
Reno Police Use Quote
• 8/21/00 M26 shot fired at suicidal man with shard
of broken glass. Subject slashed wrists, ignored
verbal commands and rushed Sgt. Pittman.
Subject dropped by M26 safely.
• “The attending ER physician removed the probes
and commented on how little damage was done in
comparison to the damage he usually saw after a
subject was involved in a physical confrontation
with officers. Probes and self-inflicted slash to left
wrist and no injuries to officers.”
Comparison of Injuries
TASER Technology Reduces Injuries
80%
78%
78%
80%
70%
60%
Suspect
Injured
60%
50%
45%
36%
40%
29%
30%
20%
16%
18%
11%
10%
Chemical
Spray
Swarm
Kick
Baton
Punch
Flashlight
0%
Misc. body
force
5%
0% 0%
Officer
Injured /
Affected
TASER
20%
21%
29%
Force Type
Source: Study of Use of Force at Los Angeles Police Department, Greg Meyer. Statistics are for
7-Watt TASER technology deployed at LAPD.
Original Study Available at http://home.earthlink.net/~gregmeyer/injury.html on the internet.
DID WE ACCOMPLISH OUR
MISSION TO:
“REDUCE OFFICER AND
SUSPECT INJURIES BY
STOPPING THREATS FROM
A SAFE DISTANCE?”
YES
Are there any
Questions?
TASER® International, Inc.
Troubleshooting and Tactics
ADVANCED TASER® M26
RMCP MASTER INSTUCTOR BETA
Overview
•
•
•
•
•
•
In-Custody Deaths
Troubleshooting perceived field failures
Troubleshooting M26 product
Troubleshooting Dataport
TASER Quality Control
Electrical Theory
In-Custody Deaths
In-Custody Deaths
• The ADVANCED TASER has never caused a
death
• In-custody deaths have occurred minutes to hours
after M26 use
• Medical Examiners have declared the M26 safe
• Electricity kills during application (not after). None
have died during T-Wave application. In these
cases, combinations of cocaine, drugs and alcohol
have been the cause of death
• It is key to provide the media M26 medical studies
In-Custody Deaths
Hamilton, OH
• Man swallows bag of 8-ball of cocaine during
vehicle pullover
• Several hours later, the subject becomes violent
• He fights emergency medical technicians
• Police apply two applications of M26 touch stun to
scapula
• Suspect is cuffed, walked downstairs and placed
on gurney
• Subject codes in ambulance and dies at hospital
• Medical Examiner rules death as “cocaine
abuse/accidental”
In-Custody Deaths
Hollywood, FL
• A violent man goes wild in hotel lobby and is having
difficulty breathing through tracheotomy
• Subject is verbally non-compliant and no longer
speaks English
• Police fire M26 at subject to subdue him. First shot
is one probe hit but second is successful
• Officers subdue and arrest subject
• Suspect stops breathing and dies
• Headlines: “First Time Police Kill Man with TASER”
• Medical examiner finds cocaine overdose cause of
death and rules out M26
In-Custody Deaths
Philadelphia, PA
• Police called to house of frequent domestic
violence. Man is naked and brandishing a 7-inch
knife in sub-freezing weather
• Officers use pepper spray without effect
• Officers deploy M26 (no details on shot provided)
• Subject is “ranting and raving” during drive to
hospital
• Subject later dies when arriving at hospital
• Newspaper reports: “Man TASERed Dies”
• Medical Examiner rules cocaine overdose as
cause of death and rules out M26
In-Custody Deaths
Nassau Co, FL
• Police serve drug warrant on extremely overweight
man who is mowing his lawn
• Subject runs 200 meters to an abandoned house
• Subject swings a headboard at officers, is shot by
M26 with both probes and becomes incapacitated
• Headboard falls and breaks M26 wires
• Subjects and officers fight. Touch used to subdue.
• After cuffing, the subject codes and later dies
• Headline: “Second Man Dies in FL from TASER”
• Medical Examiner rules cocaine and coronary
disease as cause of death
In-Custody Deaths
• Get as much info as possible regarding
– TASER effects
– Distance fired
– Duration of cycles
– Subject’s influence
– Time of death is critical
– Circumstances regarding arrest
– Medical Examiner’s contact info
• Contact Steve Tuttle, TASER Int’l’s Dir. Of Gov’t
Affairs: 800-978-2737 x 2006
In-Custody Deaths
• Provide press with TASER web site and phone
numbers: www.TASER.com
• Instruct media with as much info about
ADVANCED TASER
• Dr. Robert Stratbucker is available as a consultant
and court recognized expert if necessary
Troubleshooting
Perceived Field Failures
Failure Checklist
•
•
•
•
•
•
•
•
•
•
•
•
What happened? Get it from operator.
Probe placement (one or two probes)
Distance
Spread of probes
Batteries, battery tray & pulse rate
Temperature
Quiet or loud pulse
Duration of applications
Clothing worn or metal involved
Subject’s complete reaction
Countermeasures
Malfunction
Case 1: Interpretation
• Suspect had knife held to throat
• M26 deployed with probes
• Upper probe hit in throat and the 2nd 8
inches lower in the chest
• Full 5-second cycle administered
Case 1: Interpretation
• Officers statement: M26 “did not effect
the suspect”
• Suspects statement immediately following
5 second cycle: “Get these damn darts
out of me”
• Officers interpretation: “He wanted the
barbs out because they stung only and he
didn’t want to be shot again”
• Suspects post statement: “he felt nothing”
Case 1: Review
• M26 was deployed point blank
• Upper dart hit just below the throat
• Second dart hit 3 inches lower
• Suspect froze in place but did not fall
• Officer looking for “blockbuster” type hit
Case 1: Review
• Suspect dropped knife and was taken into
custody without further escalation or
incident
• Success or failure?
Case 2: Interpretation
• Suspect in shower shot with M26
• 10 separate cycles administered with
same cartridge
• Success or failure?
Case 3: Interpretation
• Suspect with boat anchor
• Shot with M26
• Suspect frozen in place
• Officers perceives failure and don’t move in
• Success or failure?
Troubleshooting
the M26
M26 Troubleshooting
Problem: Dim or no laser sight
Possible cause:
• Electric spark to laser from pulse coil
• Damage due to dropping
• Component failure
Possible solution: Return M26 to factory
M26 Troubleshooting
Problem: Laser sight on but no battery
indicator light when weapon is activated
Possible cause: Indicator light burned out or
faulty
Possible solution: Return M26 to factory
M26 Troubleshooting
Problem: Laser sight on when the weapon is
activated with steady battery indictor but
pulse rate is slow
Possible cause:
• 1 or 2 batteries installed in reverse +/• Batteries are dead or non-approved brand
Possible solution:
• Check batteries for correct +/- order
• Try a new fresh set of Duracell Ultras
M26 Troubleshooting
Problem: No laser or spark when the
weapon is activated but the battery indicator
light is steady
Possible cause:
• 3 batteries may be installed wrong +/order
• The batteries are dead
Possible solution:
• Check batteries for correct +/- order
• Try a new fresh set of Duracell Ultras
M26 Troubleshooting
Problem: No laser, battery indicator or spark
Possible cause:
• Batteries installed incorrectly
• Defective battery tray or no contact with
springs
• Safety switch weld is broken
• Internal component failure
Possible solution:
• Check battery installation, battery tray
• Check battery points of contact
• If batteries check out, return M26 to factory
M26 Troubleshooting
Problem: Intermittent pulse rate during cycle
Possible cause:
• Defective battery tray springs
• Pulse coil failure
Possible solution:
• Replace battery tray with new tray
• Contact factory to demonstrate spark rate
over the phone
• Return M26 to factory
M26 Troubleshooting
Problem: Batteries get extremely hot or melt
and the unit does not function
Possible cause: Internal component failure
of FET
Possible solution: Immediately remove
batteries and return M26, batteries, and
battery tray to factory
M26 Troubleshooting
Problem: During activation pulse rate changes
speed - slow to very fast.
Possible cause: Internal component failure of
capacitor
Possible solution:
• Contact factory to demonstrate spark rate
over the phone
• Return M26 to factory
M26 Troubleshooting
Problem: During activation the unit begins to
make an internal pop, whine or crackle. There
is no spark emitted at all through the 5 - sec.
cycle
Possible cause: Internal component failure of
capacitor or coil
Possible solution: Return M26 to factory
M26 Troubleshooting
Problem: Upon activating the unit begins to
make an internal sizzle or crackle then emits
the spark after about a second delay
Possible cause:
• Capacitor is charging (note: this may self
correct after first activation)
Possible solution:
• Prior to field deployment spark the unit
• Contact factory
M26 Troubleshooting
Problem: Laser and battery indicator function,
however the unit does not fire / cycle
Possible cause:
• Defective trigger or broken wire
• Internal component failure
Possible solution: Return M26 to factory
Cartridge Troubleshooting
Problem: One or more of the wires break
during dart deployment (not caused by subject)
Possible cause:
• During application of the wire insulation, the
wire was stretched and break but was held
together by the insulation
• Operator error during door welding
Possible solution: Return cartridge to factory
for replacement
Cartridge Troubleshooting
Problem: Front blast door has fallen off
Possible cause:
• Nitrogen capsule seal is not properly seated
• Cartridge was hit or exposed to heat
• Contamination during sonic weld process
Possible solution:
• Return cartridge to factory for repair
• Tape doors in place using Scotch tape and
use cartridge for TRAINING ONLY
Troubleshooting Dataport
Dataport Troubleshooting
Problem: Dataport displays “no response
from device”. No indicator light on M26 or
green light on converter.
Possible cause:
• Batteries are not installed
• Safety switch position
• Broken internal dataport connection wire
Possible solution:
• Install batteries in the M26
• Try safety switch in ON & OFF positions
• Contact factory service representative
Dataport Troubleshooting
Problem: Dataport displays “missing
acknowledge from device”
Possible cause:
• Wrong comm port selected
• Connection between M26 & computer
• No battery in M26
Possible solution:
• Select alternate comm ports
• Check connection hardware
• Install batteries in M26
Dataport Troubleshooting
Problem: Dataport reads “expecting record
size”
Possible cause: Revision of the M26 does not
match the version of the download software
Possible solution: Try using software version
1 or 2 (available on 7.0 & higher versions of
TASER CD)
Dataport Troubleshooting
Problem: Dataport reads “comm port in use or
busy”
Possible cause: Comm port is currently being
used by another program
Possible solution: Exit other comm port
program and re-try
Dataport Troubleshooting
Problem: Upload device data contains corrupt
or inaccurate information
Possible cause:
• Some Windows® ‘98 versions have caused
incompatibility problems
• Computer chip is corrupted
Possible solution:
• Run program on computers with NT / 2000
• Return unit to factory for download attempt
or chip reset (reset will erase memory)
Dataport Troubleshooting
Problem: Clock and information displayed
reads all zeros
Possible cause: Clock battery is defective and
no information available
Possible solution: Return M26 to factory
Dataport Troubleshooting
Problem: Serial number does not display on
download information or reads [X’s]
Possible cause:
• Using v.1 dataport software to read v.2 M26
• M26 is v.1 and is not serial number capable
• [X’s] when S/N is not initialized at factory
Possible solution:
• Switch to v.2 dataport download software
• If [X’s], return to factory for setting
Dataport Troubleshooting
Problem: Saved download information as a
file but unable to open
Possible cause: Data is saved as a “.dat”
text file
Possible solution: Open Notepad or Word,
choose file open. Go to directory where file
is saved. Select all files in the files type
prompt of the open dialog box. Select the
“.dat” file and click open.
TASER Quality Control
Quality Control
• NiMH batteries, battery tray, all components
including the pulse coil, capacitors, and
circuit board are independently tested prior
to installation
Quality Control
• When all components are installed, the M26
is fired over 40 times before leaving TASER
Int’l. These firings are noted on dataport
download when the units arrive to the end
user.
Quality Control
• All Air Cartridges are X-Rayed
Electrical Theory
Electrical Output Analogous to
Water Flow
."
The Variables
Batteries
Flow = Amperage
168 mA
Pressure = Voltage
50,000 V
Mass & Pressure of Pulse
= Energy
1.76 Joules
Capacitor
Energy per pulse & # per
second = Power
26 Watts
Low Battery = Low Pulse Rate
.-
Strong Battery = High Pulse
Rate
."
EMD vs. Stun: Stronger
Pulses
7-Watt Stun
26 Watt EMD
Why Pulse Rate is Important
c e Co a' -·0
5
e I econd
2: sec
Tim
Why Pulse Rate is Important
sc e Co· _ract- 0
10 pu e I econd
1
2 sec
ime
Why Battery Indicator is
only for Alkaline Batteries
at e
'12: V
't:===~:=:::=;;:====:;;~:=~---
'9~6 v I ~
'1'1,.'1
c
NiMH’s Perform Better
Over Time
oer Out
t
G)
o
E
#I of Uses
NiMH’s Perform Better at Low
Temperatures
Po e Output
By e
erat re Range
o
a.
aOF
mper lure
·30 F
Are there any
questions?
TASER International
Ausbildungspräsentation
ADVANCED TASER M-26
Version 8.0, Stand 25.06.2002
Übersicht
•
•
•
•
•
•
•
•
•
•
•
•
•
•
Warum ADVANCED TASER
Das Waffensystem im Überblick
Funktionsweise
Elektrische und Medizinische Aspekte
ADVANCED TASER Daten
Rechtliche Aspekte und Vorschriften
Handhabung
Taktik
Anwendung gegen aggressive Tiere
Vorbeugung und Analyse von Mißerfolgen
Praktische Übungen
Zubehör und Wartung
Freiwilligenversuche
Lernkontrolle
Sicherheitsregeln
• Nie auf etwas richten, auf das man nicht
schießen will
• Sicherung aktiviert lassen, bis die Waffe in
eine sichere Richtung (auf das Ziel) deutet
• Nie den Finger in den Abzugsbügel bringen,
bevor die Entscheidung zum Schuß gefallen
ist
• Nie eine Hand vor die Waffe bringen, vor
allem nicht beim Kartuschenwechsel
(Klick auf den Bildschirm startet Video)
Warum ADVANCED TASER?
ZIEL:
VERRINGERN DER
VERLETZUNGSGEFAHR FÜR
DEN BEAMTEN UND DEN
TÄTER DURCH STOPPEN VON
BEDROHUNGEN AUS
SICHERER ENTFERNUNG.
ADVANCED TASER
• Besonders effektiv, selbst im Vergleich zu
Schußwaffen
• Sicher
• Stellt keine Gesundheitsgefährdung für Täter
und andere Einsatzkräfte dar
• Einfach zu gebrauchen und zu warten
Der ADVANCED TASER
ist kein Ersatz für den
Schußwaffengebrauch.
Allerdings haben viele Situationen, die auf einer
niedrigeren Eskalationsstufe beginnen, das Potential,
um bis zur Notwendigkeit des Schußwaffengebrauchs
zu eskalieren. Der frühe, aggressive Einsatz eines
nonletalen Einsatzmittels wie des M26 wird in vielen
dieser Fälle diese Eskalation verhindern.
Der ADVANCED TASER hat
die größte Wirkung auf die
Sicherheit der Einsatzkräfte,
wenn er bereits den
Streifenbeamten zur
Verfügung steht, die als erste
vor Ort sind.
Handwerkszeug für den
Streifenbeamten
(Klick auf den Bildschirm startet Video)
Das Waffensystem im
Überblick
Definitionen
Conducted Energy Weapons sind nonletale Waffen, die über verschossene
Kabel auf ein entferntes Ziel Energie übertragen, welche das zentrale
Nervensystem eines Körpers aus der Distanz beeinflußt.
AIR TASER® und ADVANCED TASER® sind Markennamen für bestimmte
Conducted Energy Weapons, die von TASER International hergestellt werden.
Geschichte der Taser-Technologie
• Der ursprüngliche TASER mit Schießpulver als
Treibmittel wurde 1966-1974 entwickelt und als
Handfeuerwaffe eingestuft.
• Er erwies sich als schonendes Einsatzmittel, das
aber eine starke physiologische und psychologische
Wirkung sowohl auf Menschen als auch auf Tiere
hat.
• Der ursprüngliche Tasertron TASER ist ein 7-Watt
“Schock”- System mit 86% statistischer Erfolgsquote.
• TASER International, Inc. entwickelte 1994 das 7Watt-System AIR TASER, das nach US-Recht nicht
als Handfeuerwaffe eingestuft ist.
• TASER International, Inc. stellte im Dezember 1999
den ADVANCED TASER vor. Über 1.400
Dienststellen weltweit setzen den ADVANCED
TASER zur Zeit ein.
Weshalb es funktioniert
• Das menschliche Nervensystem kommuniziert
mit Hilfe einfacher elektrischer Impulse.
• Der ADVANCED TASER nutzt ähnliche
elektrische Impulse, die als TASER-Wellen
bezeichnet werden.
Jamming
the Nervous stören
System
Das Nervensystem
Nervensignal
Nerve
Signal or
oder
„Hirnwelle“
"Brain
Wave
II
TASER-Welle
Taser
Wave or
oder
T-Welle
liT-wave
II
Weshalb es funktioniert
• Conducted Energy Weapons sind wirkungsvoll,
weil sie diese elektrischen Impulse überlagern.
• Mit 18/26 Watt kann der ADVANCED TASER
das zentrale Nervensystem des menschlichen
Körpers stören.
• Er beeinflußt sowohl das sensorische als auch
das motorische Nervensystem.
• Er ist in der Wirkung nicht davon abhängig, daß
Schmerz empfunden wird, ist aber schmerzhaft.
Schocker gegen EMD
• Elektroschocker-Systeme -- Die 7 Watt TASER
der ersten Generation stören das zentrale
Nervensystem mit elektrischen Störgeräuschen.
Damit wird nur das sensorische Nervensystem
betroffen.
Leistung: 5-15 Watt
• EMD (Electro-Muscular Disruption) -Systeme
stören UND überlagern das zentrale Nervensystem
und erzeugen so unkontrollierbare Kontraktionen
von Muskelgewebe. Der ADVANCED TASER
beeinflußt sowohl das sensorische als auch das
motorische Nervensystem.
Leistung: 16-26 Watt
Schocker gegen EMD
Zentrales Nervensystem
Schaltzentrum (Gehirn und Rückenmark),
verarbeitet Informationen und trifft
Entscheidungen.
Sensorisches Nervensystem
Nerven, die Informationen von den Sinnen zum
Gehirn transportieren. Berührung, Temperatur,
etc.
Schocker wirken auf diese Nerven.
Motorisches Nervensystem
Nerven, die die Befehle vom Gehirn zu den Muskeln
transportieren, um die Bewegungen zu kontrollieren.
EMD-Systeme beeinflussen sowohl das
sensorische als auch das motorische
Nervensystem.
Schocker gegen EMD
(Klick auf den Bildschirm startet Video)
ANMERKUNG: Der Proband ist ein hochmotiviertes Mitglied eines SWAT-Teams. Seine Aufgabe
ist, die Faust vor ihm zu greifen sowohl unter Einwirkung des Schocker- als auch des EMDSystems. Das Video demonstriert die hohe Effizienz des EMD-Systems selbst bei ungewöhnlich
fokussierten Individuen.
Schocker gegen EMD
(Klick auf den Bildschirm startet Video)
ANMERKUNG: Jeder Proband hatte die Aufgabe, den Ausbilder zu erreichen. Dies zeigt die Wirkung
des EMD-Systems auf diese hochmotivierten Selbstverteidigungsausbilder. Zu bemerken: das
Schocker-System kann mit entsprechender Motivation und Fokussierung überwunden werden.
Wie es funktioniert
Faustregel: durch den Abwärtswinkel des unteren Pfeils
von 8 Grad erhöht sich der Pfeilabstand um je ca. 15cm
pro Meter Abstand zum Ziel.
ObererTop
Pfeil:
Waagerecht
Probe
Straight
2. Pfeil: 8
2nd PrObe
8 Degree
° nachDown
untenAngle
Wie es funktioniert
• Die Pfeilführungen der Kartuschen stehen
jeweils in einem 4°-Winkel.
• Der Kartuschenschacht des ADVANCED
TASER ist 4° nach unten abgewinkelt.
• Dies senkt den oberen Pfeil um 4° auf 0° und
Rule of Thumb: 1 foot of spread for every 7 feet
fügt dem unteren 4° zu seinen eigenen 4° hinzu
= 8°-Winkel nach unten.
Wirksam in Nahdistanz
Einsatzdistanz
Kontakt
0,3 – 1 Meter
1 – 2,1 Meter
2,1 – 3,3 Meter
3,3 – 4,5 Meter
4,5 – 6,5 Meter
Gesamt
Einsätze
% Erfolg*
215
81
269
214
123
24
1159
92.09%
97.53%
95.54%
92.06%
91.06%
83.33%
94.13%
* Erfolg ist definiert als Überwältigung des Täters ohne weitere
Eskalation.
TASER-Welle
• Der Elektroimpuls kann INSGESAMT bis
zu ca. 6,5 cm Kleidung oder Luftspalt
überwinden. Ohne direkten Kontakt eines
Pfeils bedeutet dies ca. 3,2 cm pro Pfeil.
(Klick auf den Bildschirm startet Video)
Wirkung auf Schutzweste
(Klick auf den Bildschirm startet Video
)
Elektrische und
medizinische Aspekte
Elektrische Daten M-26
•
•
•
•
Hohe Spannung: 50.000 Volt
Leistung: 26 Watt
Niedrige Stromstärke: 0.162 Ampère
Sichere Energie: 1.76 Joule pro Impuls
(Medizinischer Defibrillator hat mehr als 150
Joule pro Impuls)
• Die Übertragung von Elektrizität in den
menschlichen Körper liegt bei 1/100 des
Gefahrengrenzwertes
• Hohe Spannung + Hohe Leistung + Niedrige
Stromstärke = Sichere & wirksame Waffe
Elektrische Theorie
Medizinische Sicherheit
• Tests mit dem ADVANCED TASER haben ergeben:
– Keine Auswirkung auf den Herzrhythmus
• Erprobt in Tierversuchen
– An über 3000 menschlichen Freiwilligen getestet
– 99% sofortige Stopwirkung in weniger als einer
Sekunde
• Keine Langzeitschäden
– Die elektrischen Impulse sind sicher innerhalb der
Grenzwerte nach internationalen Standards.
– Leichte Hautirritationen bis Blasen
Medizinische Ergebnisse
bzgl. Herzschrittmachern
• Moderne Herzschrittmacher widerstehen
elektrischen Defibrillatoren, die einige
hundertmal stärker sind als die ADVANCED
TASER-Impulse
• Bei direktem Kontakt mit dem
Herzschrittmacher kann dessen Rhythmus
vorübergehend ohne Gesundheitsgefährdung
verändert werden.
Medizinische Ergebnisse
bzgl. Herzversagen/Drogen
• In Versuchen der Univ. von Missouri wurde der
ADVANCED TASER direkt auf den Brustkorb von
Versuchstieren angewandt, ohne Herzversagen
erzeugen zu können.
• Führende Experten der Kardiologie stellten selbst bei
der Simulation ungünstigster Umstände fest, daß
keines der beiden Systeme den Herzrhythmus
beeinflußte
• Es erfolgte auch keine Beeinflussung, als den
Versuchstieren Drogen verabreicht wurden (Epinefrin
& andere, die PCP & Kokain ähneln), die das Herz
anfälliger für elektrische Stimulation machen.
Verhalten der betroffenen
Täter beeinflußt durch:
Ergebnisse aus Realeinsätzen
•
•
•
•
•
•
Alkohol
Geistige Verwirrung
Methamphetamin
Kokain
Sonstige Drogen
PCP
37,5%
23,0%
3,8%
4,6%
1,0%
1,0%
Täter unter PCP
(Klick auf den Bildschirm startet Video)
Bisher wirkten alle nonletalen Waffen
über Schmerzimpulse, die durch Drogen
Alkohol, geistige Verwirrung oder starken
Willen überwunden werden können.
Der ADVANCED TASER ist nicht von der
Schmerzwirkung abhängig, um das
Aufgeben des Täters zu erreichen. Er
überlagert das zentrale Nervensystem
und macht so angriffsunfähig.
Vergleich der Verletzungen
TASER reduziert Verletzungen
80%
78%
78%
80%
70%
60%
60%
50%
Täter
verletzt
45%
36%
40%
29%
29%
30%
20%
20%
21%
Anwender
verletzt
18%
16%
11%
10%
5%
TASER
Pfefferspray
Schwarm
Fußtritt
Gewalt
sonst körperl
Schlagstock
Faustschlag
0%
Stablampe
0% 0%
Eins atzm itte l
Quelle: Studie über den Einsatz von Gewalt beim Los Angeles Police Department, Greg Meyer.
Statistik bezieht sich auf 7-Watt TASER Technologie, die beim LAPD im Einsatz ist.
Original Studie erhältlich unter http://home.earthlink.net/~gregmeyer/injury.html im Internet.
ADVANCED TASER-Tests der
kanadischen Polizei
Vergleich: Schmerz gegen Muskelimpulse
(Klick auf den Bildschirm startet Video)
Medizinische
Zusammenfassung
• Studien haben gezeigt, daß durch TaserTechnologie keine Langzeitfolgen entstehen.
• Eine Studie des University of Southern California
Medical Center stellt fest, daß der 7-Watt TASER
0% Langzeitverletzungen hinterläßt.
• Tests des ADVANCED TASER an über 3.000
Freiwilligen ergaben ebenfalls 0%
Langzeitschäden.
• Vorübergehende Verletzungen können durch den
Sturz verursacht werden. (Die bisher schwersten
waren Schürfwunden und blaue Flecken.)
(Klick auf den Bildschirm startet Video)
ADVANCED TASER
Das Gerät
ADVANCED TASER M-26
Hergestellt aus schlagfestem Polymer
Sicherung
Visierung
Optionale
Farbmarkierung
Abzug
Ai Cartridge
Kartusche
Laser
Sight
Laserzielgerät
ry Indicatolr
Batte
Batterieladestandsanzeige
~ Battery
Cov,er
Batteriefach-
deckel
Battery
Cover Pin
Batteriefachdeckelsperre
Dataport
M-26: Dataport
Sicherung / Abzug
Þgesichert
(Aus)
Þentsichert
(Eingeschaltet,
Laser an)
Ladestandsanzeige
• LED-Leuchte aktiv wenn ADVANCED
TASER entsichert ist
• Ladestandsanzeige funktioniert nur mit
alkalischen Batterien -- nicht NiMHAkkus
Ladestandsanzeige
• Für alkalische Batterien:
• Blinklicht = Batterien voll genug
• Dauerlicht = Batterien zu leer (Gerät kann noch
funktionieren, das kann sich aber jederzeit
ändern). Überprüfen, ob Batterien richtig
eingelegt sind (+/-)
• Kein Licht = Batterien ganz leer
Ladestandsanzeige nur für
alkalische Duracell® Ultra
at e
'12: V
't:===~:=:::=;;:====:;;~:=~---
'9~6 v I ~
'1'1,.'1
c
Batterie-Test für NiMH-Akkus
• Ladestandsanzeige ist eingerichtet für alkalische
Batterien und wird im Betrieb von Akkus nicht korrekt
anzeigen.
• Bei Akkus wird immer ein niedriger Ladestand
angezeigt, selbst wenn sie voll geladen sind.
• Prüfen des Ladezustands der Akkus durch Entnahme
der Kartusche, Entsichern, Betätigung des Abzugs
und Überprüfen auf eine hohe Impulsfrequenz.
(12-15 pro Sekunde)
• Wieder sichern und Kartusche wieder einstecken.
Kartuschentypen
5m-Kartusche
(gelb = schußbereit)
Zivile Variante
7m- Kartusche
(gelb = schußbereit)
Behördenvariante
Kartuschentypen
Verbrauchte Kartusche Mündungsdeckel fehlen.
ohne Pfeile und Kabel
Zurücksenden oder zum
Training verwenden.
Schußmechanismus
• Stickstoffkapsel mit Druck von ca.125 Bar,
nichtentflammbar
• 2 Pfeile verschossen mit Geschwindigkeit
von ca. 60 m/s
• Höchstreichweite: ca. 7m (21 Fuß)
Kabel
• Kabel bestehen aus isoliertem verkupfertem
Stahl
• Kabel können reißen, wenn Sie gezogen werden
oder darauf getreten wird
• Unbeabsichtigter Kontakt mit Kabeln oder Pfeilen
während der ADVANCED TASER aktiviert ist
kann zu Stromschlag führen
• Der ADVANCED TASER-Schütze muß die
Zugriffsbeamten anweisen, während der
Festnahme die Kabel zu meiden
Pfeile
• 7mm lange sterile Angelhaken “ Größe 8” mit
Widerhaken
• Bauartbedingt kann der Pfeil nicht tiefer als 7mm
eindringen, selbst in Kontaktdistanz
• Können eine kleine punktuelle Hautverletzung oder
leichte Hautrötung ähnlich Sonnenbrand bis zu kleinen
Blasen verursachen
Kartuschenhalter
(Zubehör, nachrüstbar – ersetzt Batteriefachdeckel)
Kartuschentasche
• DeSantis Gürteltasche für 2
Ersatzkartuschen, Leder
Praktische Anwendung
Bereit...
•
•
•
•
TASER aus dem Holster ziehen
Finger vom Abzug
In sichere Richtung halten
Entsichern (Sicherungsflügel hochschwenken)
Zielen...
• Ziel erfassen: Mitte Brustkorb, oder Beine
• Laser/Visierung kennzeichnet Treffpunkt
des oberen Pfeils
• 2. Pfeil trifft gerade darunter mit 8° Versatz
Vertikales Ziel
Gewinkeltes oder
liegendes Ziel
Schießen:
Automatischer Zyklus
• Einzelne Betätigung des Abzugs löst die Abgabe von
Elektroimpulsen für 5 Sekunden aus
• Weitere Abzugsbetätigungen während des 5-SekundenZyklus beeinflussen die Dauer nicht, wenn nicht dauerhaft
gehalten
• Wird der Abzug über die Dauer der 5 Sekunden hinaus
gehalten, dauert die Abgabe von Impulsen an, bis der Abzug
losgelassen wird.
• Der ADVANCED TASER kann 10 aneinander anschließende
5-Sekunden-Zyklen abgeben, ohne unter
Trainingsbedingungen die Lebensdauer des Gerätes durch
Überhitzung einzuschränken. Im Einsatz kann diese Zahl im
Bedarfsfall deutlich überschritten werden.
• Wenn möglich Gelegenheit zum Abkühlen des Geräts nutzen
• Bei ungewollter Schußabgabe SOFORT abschalten!
Wichtig beim Einsatz:
• Der Elektroimpuls des ADVANCED TASER ist relativ leise
im Einsatz am menschlichen Ziel
• Der ADVANCED TASER ist im Gebrauch mit den TASERZielscheiben laut, weil der Strom Lichtbögen in der Luft schlägt
• Wenn die Pfeile Kontakt zur Haut bekommen ist die elektrische
Entladung relativ leise, weil die Energie direkt in den Körper
fließt.
• Wenn die Elektroimpulse beim Realeinsatz laut sind und
der Täter nicht reagiert, hat der Strom wahrscheinlich
einen kürzeren Weg gefunden als durch das Ziel und ist
somit nicht wirksam – nachladen und 2. Schuß auf andere
Zielfläche (z.B. Bein)
Effektive Trefferflächen
Sprays
ADVANCED HandfeuerTASER
waffen
Pfeile
Pfeile vorher & nachher
“Sensibler” Treffer
Taktik nach dem Schuß
• Der ADVANCED TASER-Schütze muß darauf
vorbereitet sein, den Abzug gedrückt zu halten,
solange der Täter festgelegt wird
• Täter ist nur solange beeinträchtigt, wie der
Elektroimpuls fließt – das Zeitfenster für den
Zugriff
• Die Sicherheitskräfte sollten dem Täter während und
nach der TASER-Anwendung klare verbale
Anweisungen geben
• Die Sicherheitskräfte müssen ohne Zögern fixieren
und fesseln
– Pfeile und Kabel nicht berühren oder darauf treten
Einsatz als Kontaktgerät
• Der ADVANCED TASER kann auch als Kontaktgerät
eingesetzt werden, nachdem die Pfeile verschossen wurden
• Der ADVANCED TASER wird eine geladene Kartusche
immer verschießen, wenn er bei eingesetzter Kartusche
aktiviert wird
(Klick auf Foto startet Video)
Einsatz als Kontaktgerät
• Für den Gebrauch als Kontaktwaffe geladene
Kartusche entfernen
Ohne Kartusche
Einsatz als Kontaktgerät
Im Kontaktmodus zu Selbstverteidigungszwecken den
ADVANCED TASER pressen gegen:
• Halsseiten
• Unterleib
• Oberschenkelaußenseiten
Bei Personen, die sich im Stadium einer psychischen
Krise, unter dem Einfluß von bewußtseinsverändernden
Substanzen oder in einem sehr entschlossenen
Geisteszustand befinden, kann die Schmerztoleranz eine
so hohe Stufe erreichen, daß die Wirkung des ADVANCED
TASER als Kontaktgerät eventuell eingeschränkt sein
kann, da hier im Gegensatz zum Einsatz der Pfeile durch
die geringe Spreizung hauptsächlich der Schmerzreiz als
Mittel der Überwältigung dient.
Erfolgsrate bei 267 erfaßten Einsätzen: 92.1%
Batterie- und
Kartuschenwechsel
Batteriemagazin
entnehmen
Sicherung aktivieren
• Kartusche abnehmen
• Batteriefachdeckelsperre
mit Stift oder
Handschellenschlüssel
eindrücken
• Deckel herausziehen
• Batteriemagazin
entnehmen und laden
Batteriemagazin entnehmen
mit Kartuschenhalter
• Sicherung aktivieren
• Stift oder Büroklammer benutzen
(Handschellenschlüssel ist zu kurz)
Sperre eindrücken
Deckel abziehen
Entnehmen des Batteriemagazins
• Sanft den Boden des Griffstücks auf Oberschenkel
klopfen
• Magazin mit der Handfläche fangen.
Einlegen der Batterien
• 8 AA-Mignonzellen einlegen, V-Form beachten
• Batteriemagazin einführen mit Kontakten nach
oben und Führungsschiene nach hinten
• Batteriefachdeckel einlegen
• Batterieladestand prüfen -- Entsichern
• Wieder Sichern
• Kartusche einsetzen
Zugelassene NiMH-Akkus
• Erfolg und Aufhaltewirkung hängen
entscheidend von der Qualität der Batterien ab,
da sie auf ihrem höchsten Leistungsniveau
genutzt werden.
TASER® NiMH-Akku
1500 mAh, 1.2 Volt NiMH
Speziell für ADVANCED TASER entwickelt
Energizer® ACCU
Rechargeable™
1200 mAh up to 1800 mAh
1.2 Volt NiMH
Zugelassene alkalische
AA-Mignonzellen
1. Duracell® Ultra
1.5 Volt AA
Nicht die einfachen „Kupferkopf“
Duracell verwenden. Ultras haben
ein blaues Band.
2: Energizer® E2 ™ Titanium
1.5 Volt AA
Akkus gegen Duracell
Man hört den Unterschied
Ausbilder aktiviert
TASER® NiMH Akkus.
Man beachte 15-20
Impulse pro Sekunde
Ausbilder aktiviert Duracell®
Ultra Batterien. Man
beachte 12-15 Impulse pro
Sekunde bei frischem Satz
Auswahl der Batterien
• Wenn NiMH-Akkus verwendet werden, die nicht vom
Hersteller zugelassen wurden, können Probleme
entstehen. Bei einigen NiMH-Akkus liegt das positive Ende
nicht völlig frei (siehe roter Pfeil)
• Die Federn des Batteriemagazins könnten keinen
vollständigen Kontakt bekommen, was zu Fehlfunktionen
führt. Die Erschütterung des Abschusses kann für einen
Sekundenbruchteil der +/- Kontakt abreißen, so daß die
Impulsabgabe sofort unterbrochen wird.
• Die Mittlere und Rechte werden funktionieren, da die
positiven Enden ganz frei liegen.
• Die Kunststoff- oder Pappummantelung zu entfernen kann
die Batterie UND das Gerät beschädigen.
Auswahl der Batterien
• NiMH-Akkus erbringen die größte Leistung und
eignen sich auch für Minustemperaturen. Sie
müssen oft aufgeladen werden (Alle 2
Wochen). Die Batterieladestandsanzeige
funktioniert nicht mit NiMH-Akkus. Entladene
Batterien haben ein Versagen des Gerätes zur
Folge.
• Alkalische Batterien sind wesentlich haltbarer.
Allerdings ist die Auswahl der Batterien SEHR
wichtig. Es wird nur eine Batterie zur optimalen
Wirkung des Gerätes empfohlen:die
DURACELL® ULTRA. (Auch hier ist dringend
auf das Verfalldatum zu achten.)
NiMH-Akkus: lange gleiche
Leistung
oer Out
t
G)
o
E
#I of Uses
NiMH-Akkus: bessere Leistung
bei niedrigen Temperaturen
Po e Output
By e
erat re Range
o
a.
aOF
mper lure
·30 F
Kartusche laden
• Sicherheit geht vor!!
• Behandeln als geladene Schußwaffe
• Hauptaugenmerk:
– Immer sichern (Sicherung nach unten)
– Finger weg von Mündungsdeckel
– Waffe in sichere Richtung halten
– Finger vom Abzug
Kartusche laden
• TASER sichern
• Verschossene Kartusche entnehmen und
wegwerfen
– Verschossene Pfeile in sicherem Bereich plazieren
•
•
•
•
•
Ersatzkartusche aus Kartuschenhalter nehmen
Waffe in sichere Richtung halten
Finger vom Abzug
Neue Kartusche einstecken
Kartusche kann nicht falsch eingesteckt werden
Rechtliche Aspekte und
Vorschriften
Rechtliche Aspekte
• TASER International Inc. wurde nie auf
Produkthaftung verklagt (Stand 19.05.2002)
• Der TASER allein war bisher für keinen
Todesfall verantwortlich
• Andere Faktoren, die zum Tod führen
können:
– Drogenüberdosen
– Schußverletzungen
– Brennbare Stoffe (z. B. Benzin)
– Sturz aus größeren Höhen
Schußwaffe
Würgetechniken
Stop Sticks
Diensthund
Wuchtgeschosse
Schlagstock
geschlossene
Faust
Reizstoffsprühgerät
TASER
offene Hände
Verbal
Anwesenheit
Eskalationsreihenfolge
der Einsatzmittel
(Beispiel)
Analyse von Einsatzberichten:
Umstände des Einsatzes
• Gewalttätig
• Widerstand gg.
Festnahme
• Suizidal
• Verbarrikadiert
• Störung der
öffentlichen Ordnung
• Zustellung Strafbefehl
• Angriff auf Beamte
32,28%
29,36%
16,23%
6,02%
11,61%
5,65%
4,44%
Die Auswertung enthält in der Summe mehr als 100%, da einige Situationen mehrere Kriterien erfüllten.
Fall 1: Potentieller Einsatz
•
•
•
•
•
•
Chandler PD, AZ Sept. ‘98
115 kg, männl.
Erregt, außer Kontrolle, unbewaffnet
Behauptet, HIV + zu sein
Kleiner, beengter Raum,
Ergebnis: „Schwarm-Taktik“ – ein Beamter
gebissen, Täter Kiefer gebrochen
• ANMERKUNG: Der Einsatz eines TASER hätte die Verletzungen und das
Infektionsrisiko sowohl der Beamten als auch des Täters in einem solchen
Szenario auf engem Raum wesentlich reduzieren können.
Fall 2: suizidales
Mädchen
•
•
•
•
13-jähriges Mädchen
Im Badezimmer eingeschlossen
2 Fleischermesser
Attackiert die Beamten mit hocherhobenen
Messern
• ADVANCED TASER eingesetzt, sofortige
Angriffsunfähigkeit, niemand verletzt
• “Alle Beamten vor Ort sind sich einig, daß das
Mädchen ohne den ADVANCED TASER heute
tot wäre.”
Fall 3:
Einsatz im Strafvollzug
• Mecklenburg County Sheriff, NC Aug.
‘98
• 60 Beamte verletzt durch
Strafgefangene im vergangenen Jahr
• Das neue Gefängnis wurde durch
Aufstände erheblich beschädigt
• AIR TASER wurde erfolgreich in 6
Zellenräumungen eingesetzt
• “Jetzt haben wir das friedlichste
Gefängnis in North Carolina”
Fall 4: Zellenräumung
(Klick auf den Bildschirm startet Video)
Taktik
Dauer der Anwendungen
im Einsatz
1 Sekunde
9
2 Sekunden
20
3 Sekunden
31
4 Sekunden
18
5 Sekunden
443
Mehr als 1 Zyklus
279
Beinhaltet nur tatsächliche Einsätze des ADVANCED TASER
basierend auf 800 Einsatzberichten.
Yuma PD Video, Klick auf Bildschirm
Zielen mit dem ADVANCED
TASER
• Zielen wie mit der Dienstpistole
• Nutzung der Visierung oder des Lasers
• Beachtung der üblichen Sicherheitsregeln für
Schußwaffen
Verhältnis der Distanz zum Pfeilabstand
Faustregel: durch den Abwärtswinkel des unteren Pfeils von 8
Grad erhöht sich der Pfeilabstand um je ca. 15cm pro Meter
Abstand zum Ziel.
Distance
Distanz zum Ziel :
Abstand der Pfeile:
0.5m
10cm
1.5m
23cm
2m
33cm
3m
45cm
4.5m
66cm
6.5m
90cm
Richtiges Schießen
• Idealer Schuß = 3 bis 5,5 Meter Distanz
• Mindestschußweite = 1 Meter (Sicherheit des
Schützen/Pfeilspreizung)
• Zielen wie mit der Dienstpistole = Mitte Brustkorb oder Beine
• Senkrecht halten – kein Verkanten im „Antonio Banderras-Stil“,
es sei denn, das Ziel liegt
• Wenn möglich bewegen und auf den Rücken des Täters schießen
• Kleidung liegt enger an
• Überraschungsfaktor
• Stärkere Muskeln – noch sicherere Kontrolle
• Gesicht, Kehle oder Genitalien können nicht getroffen werden
• Einsatz aus der Deckung und mit Sicherung durch Schußwaffe
Einsatzergebnisse
1.645 registrierte reale Anwendungen des
ADVANCED TASER
• Erfolgsquote
• Entfernungen
– 0,3-2 Meter
– 2-5 Meter
– 5-7 Meter
94,6%
487
477
29
49,0%
48,0%
2,9%
In 377 Fällen wurde die Distanz nicht angegeben.
Taktische Aspekte
• Hauptsächliche Schwierigkeit : Lose
fallende oder sehr dicke Kleidung
– Dorthin zielen, wo die Kleidung dichter
anliegt
– Kleidung liegt meist am Rücken enger an
– T-Welle kann EINIGE ballistische
Schutzwesten durchdringen, aber nicht alle.
– Maximale Durchdringung von Kleidung ist
6cm oder 3cm pro Pfeil
• Eindringen der Pfeile in die Haut ist nicht erforderlich, weil
die elektrischen T-Wellen zum Körper überspringen.
Einsatz beim Toronto SWATTeam
(Klick auf den Bildschirm startet Video)
Durchdringen von Kleidung
Taktische Aspekte
• Gebrauch des gesunden Menschenverstands
• Geeignet für Einsatz in geschlossenen Räumen /
räumlicher Enge
• Einsatz zur Abwendung gewalttätiger
Konfrontationen
• Die Kabel sind leicht isolierte Drähte, die leicht
reißen können, wenn man darauf tritt oder wenn ein
laufendes Ziel getroffen und dabei der Abstand der
Kabellänge überschritten wird. („Den Hund an der
Leine führen“).
Taktische Aspekte
• DER VOLLE 5-SEKUNDEN-ZYKLUS SOLLTE
IMMER OHNE VORZEITIGE UNTERBRECHUNG
AUSGENUTZT WERDEN
(ES SEI DENN DIE ÄUSSEREN UMSTÄNDE ERFORDERN ES)
• JEDER 5-SEKUNDEN ZYKLUS BIETET EIN
“ZEITFENSTER” FÜR DAS ZIGRIFFSTEAM, UM
DEN ANGREIFER ZU KONTROLLIEREN UND ZU
FIXIEREN
• WEITERE AUSLÖSUNGEN SIND MÖGLICH,
SOLANGE DIE KABELVERBINDUNG BESTEHEN
BLEIBT. DAMIT KANN DER ANGREIFER AM
BODEN GEHALTEN WERDEN, BIS HILFE
EINTRIFFT.
Zeitfenster
• Kann das Zugriffsteam diesen Täter festnehmen?
• Würden die Beamten betroffen? Ist der Impuls leise?
(Klick auf den Bildschirm startet Video)
Taktik: Zwei 5-Sekunden Zyklen
(Klick auf den Bildschirm startet Video)
Taktische Aspekte
• Nichts ist wirklich 100% effektiv
• Zugriff innerhalb des 5-Sekunden Zeitfensters
• Der Anwender sollte generell darauf vorbereitet
sein, bei Versagen eines Einsatzmittels auf
einen anderen Plan zurückzugreifen.
• Der Anwender sollte wann immer möglich
Deckung und Abstand zum Angreifer nutzen,
um seine eigene Sicherheit zu gewährleisten
• Ein physisches Festnehmen des Angreifers
sollte nur dann erfolgen, wenn der Anwender
nicht allein ist. Ansonsten warten bis Hilfe
eintrifft oder Nachladen und Rückzug unter
Androhung des erneuten Einsatzes.
Taktische Aspekte
• Umgebung und Hintergrund des Täters beachten
• Vor dem Einsatz “TASER! TASER!” oder Ähnliches
rufen, ein reflexartiges „Mitschießen“ anderer mit
der Schußwaffe zu verhindern.
• Wenn es sinnvoll erscheint, kann vor dem Einsatz
mit dem Lichtbogen gedroht und so ein Aufgeben
des Täters bewirkt werden.
• Wenn es sinnvoll erscheint sollten verbale
Kommandos erteilt werden.
• Der Einsatzbefehl sollte nicht „Feuer“ oder „Schieß“
lauten (“Einsatz!”, „Taser!“ etc.)
• Anwendung eines weiteren 5-Sekunden-Zyklus,
wenn der Täter sich widersetzt
• Auf Änderung im Verhalten des Täters achten
Taktische Aspekte
• Im Einsatz sollte eine 2. Kartusche stets griffbereit
oder ein 2. ADVANCED TASER verfügbar sein.
• Taschen der Kleidung können für das
vorübergehende Bereithalten genutzt werden.
• Wenn der erste Schuß versagt oder nicht trifft:
– Zum Nachladen Deckung nutzen oder auf andere Taktik
zurückgreifen.
– Wenn der Täter angreift ausweichen und den
ADVANCED TASER aggressiv als Kontaktgerät
einsetzen.
• Wenn die Kartusche versagt, sofort mit einer
frischen Kartusche nachladen und erneut
schießen. Nicht erneut versuchen, diese
Kartusche zu verschießen!!
– Sofort Taser Intl. informieren und Kartusche einschicken
Was kann schiefgehen?
•
•
•
•
•
•
•
•
Kleidung dicker als 6cm
Schwache Batterien
Trefferbereich mit wenig Nerven/Muskelmasse
Nur ein Pfeil trifft
Defekte Kartusche / Versagen des Geräts
Bedienfehler
Fehlschuß
Reaktion des Täters / Erwartung des Schützen
– Täter bleibt unbeweglich stehen: erscheint nicht
beeinträchtigt
•
•
•
•
Kabel reißen
Batterien falsch eingelegt oder entladen
Zielwinkel – Position des Täters
Treffer auf Reißverschluß, Niete oder Knopf
Was kann schiefgehen?
•
Treffer stimuliert nur wenig Muskelmasse:
– Ein Treffer in einer Körperregion mit wenig
Muskelmasse oder Nervenbahnen kann den
Täter eventuell nicht umwerfen. Der Täter kann
aber dadurch trotzdem bewegungsunfähig
gemacht werden.
– Ein Treffer aus kurzer Entfernung mit nur
geringem Abstand der Pfeile könnte nicht genug
Muskelmasse betreffen um den Täter
umzuwerfen, wenn dieser stark zielorientiert,
geistig verwirrt oder unter Drogeneinfluß ist.
– Wenn der Täter stehen bleibt, wird ein Schuß mit
einem 2. ADVANCED TASER auf einen anderen
Körperbereich empfohlen, während der
ursprüngliche Impuls fortgesetzt wird.
Bereiche mit eingeschränkter Wirkung
Unvorhersehbares
Auf Verhaltensänderung achten
((Klick auf den Bildschirm startet Video)
MURPHYs Gesetz
Fall der kanadischen Polizei
– 1. Schuß trifft Kapuzenband
• Schwingt weg vom Körper
• Unterbrochener Effekt
– 2. Schuß trifft Brieftasche
• 8 Lagen Plastik
• 2 x 5-Sekunden-Zyklen abgegeben
• Täter erstarrt, die Beamten nehmen an, daß keine Wirkung. Täter
gibt auf, um dritte Entladung zu vermeiden und sagt aus, daß er
während der ersten beiden Zyklen bewegungsunfähig war.
– Erfahrung/Lehre:
• Erwarte das Unerwartete
• Alternative Ziele müssen erwogen werden, wenn das Durchdringen
der Kleidung bei einem Treffer in der Körpermitte mißlingt oder
fraglich erscheint – z.B. Beinschuß o.ä.
• Es ist nicht sicher daß keine Wirkung da ist, nur weil der
Beschossene nicht sofort zu Boden geht. Impulse fortsetzen und
dabei Anweisungen erteilen, „Legen Sie sich auf den Boden!“ o.ä.
Die Entscheidung zum Einsatz
• NUR EINSETZEN, UM EINE
BEDROHUNG ZU BEENDEN
• NIEMALS FÜR KÖRPERLICHEN ZWANG
VERWENDEN
• Vor dem Einsatz warnen, wenn es sinnvoll
erscheint
• Versuche, den Täter mit geringeren Mitteln zu
überwältigen, waren erfolglos
– Oder werden in der Situation wahrscheinlich
erfolglos sein
Wirkung des ADVANCED
TASER
•
•
•
•
•
•
•
•
Täter kann sofort zu Boden fallen
Er könnte rufen oder schreien
Wird unwillkürliche Muskelkontraktionen haben
Täter kann unbeweglich mit „verriegelten“ Beinen
stehen bleiben
Täter könnte für einige Sekunden bis Minuten
benommen sein
Er könnte sich schwindelig fühlen
Er könnte kurzzeitigen Gedächtnisverlust erleben
Evtl. erinnert er sich nicht an Schmerz
Reaktion des Getroffenen
(unspektakuläre Wirkung)
(Click on image above to start video)
Reaktion des Getroffenen
(vollständige Verriegelung)
(Klick auf den Bildschirm startet Video)
Reaktion der Getroffenen
(Beide von je 1 Pfeil getroffen)
(Klick auf den Bildschirm startet Video)
Was TASER eventuell tun
• Kann leichte Hautirritationen ähnlich
Sonnenbrand bis zu kleinen Blasen verursachen
• Wenn direkter Kontakt mit einem
Herzschrittmacher besteht, kann dieser
vorübergehend beeinflußt werden, ohne daß
dabei ein gesundheitliches Risiko entsteht.
• Kann Augen verletzen, wenn zu hoch gezielt
wird
• Verursacht Muskelkontraktionen
• Kann zu Verletzungen durch den Sturz führen
(ggfs. problematisch bei hochschwangeren Frauen)
Was TASER eventuell tun
• Könnte Benzin oder andere
leichtentflammbare Stoffe entzünden
Was TASER nicht tun
• Schädigt nicht das Nervengewebe
• Verursacht keine ernsthaften Verbrennungen
• Es ist kein Fall bekannt, in dem ein
ADVANCED TASER einen Todesfall
verursacht hat
• Elektroimpuls nicht gefährlich für Kinder im
Mutterleib (aber der Sturz könnte schaden)
• Läßt nicht die Schließmuskeln versagen
• Kann in feuchtem Medium eingesetzt werden
ohne die Gefahr einer tödlichen Verstärkung
der Elektroimpulse (Der ADVANCED TASER
ist spritzwassergeschützt -- nicht wasserdicht)
Was nach dem Schuß
zu tun ist
• Das Zugriffsteam kann den Täter anfassen während
der ADVANCED TASER aktiviert ist.
- Nicht Pfeile, Kabel oder den Bereich zwischen
den Pfeilen berühren
- Nicht auf Kabel treten
• Anwender sollte auf 2. und 3. Zyklus vorbereitet sein
• Schnellstmöglicher Zugriff, sobald der Täter
angriffsunfähig ist
• Entstandene Verletzungen fotografisch
dokumentieren
• Verwendete Munition einsammeln und archivieren
Beispiel für Vorschrift
zum weiteren Umgang
• Pfeile entfernen oder Kabel nahe der Pfeile
abreißen
• Wenn erforderlich dem medizinischen
Personal die Einschußstellen zeigen
• Nur Ärzte dürfen Pfeile aus sensiblem
Gewebe wie Hals, Kehle, Gesicht, weiblicher
Brust oder Genitalbereich entfernen
• Entfernung aus anderen Bereichen unterliegt
der Entscheidung des Einsatzleiters und der
Zustimmung des Getroffenen.
Umgang mit
gebrauchten Kartuschen
• Pfeile, die die Haut erreicht haben, sind als infektiöse
Nadeln anzusehen und zu behandeln (Handschuhe!)
• Die Pfeile können aus der Haut entfernt werden,
indem man sie fest greift und ruckartig gerade
herauszieht. Desinfektion des Einstichs mit Jod oder
Alkohol.
• Pfeile vorsichtig mit der Spitze zuerst in die
Kartusche zurückschieben, dort mit Klebestreifen
sichern und so aufbewahren, daß niemand
versehentlich die Pfeile berühren kann.
Einzeltreffer / Entfernen der Pfeile
(Klick auf den Bildschirm startet Video)
Wirkung auf Tiere
• Tiere: der ADVANCED TASER ist bezüglich seiner
Wirksamkeit beim Einsatz auf Tiere noch nicht
vollständig erprobt. Er ist aber auf jeden Fall eine
Option im Umgang mit aggressiven Tieren, und
Realeinsätze gegen Tiere waren bisher sehr
erfolgreich.
• Zu Beachten: die bisher getroffenen Tiere wurden
bewegungsunfähig, aber erholten sich nach
Beendigung des Impulses schlagartig. Die große
Mehrzahl der Tiere flohen sofort vom Einsatzort und
zerrissen die Kabel.
• Wenn der ADVANCED TASER auf Hunde angewendet
wird, sollten diese während der Impuls einwirkt mit
einer Fangzange oder anderen Fixierungen festgelegt
werden.
Tiere
Pitbull mit ADVANCED
TASER beschossen. Ein
Beamter legte während
des 5-Sekunden Zyklus
eine Fangschlinge an.
“Tritte, Schlagstock und
Pfefferspray waren
erfolglos. Pitbull biß
einem Polizeihund in die
Kehle. ADVANCED
TASER wurde eingesetzt,
um das Leben des
Diensthundes zu retten.”
ADVANCED TASER Stärken
•
Effektive Trefferflächen
•
•
•
Sprays
ADVANCED
TASER
Schußwaffen
•
Im Gegensatz zu
Reizstoffsprühgeräten kann ein
Treffer an einer beliebigen
Körperstelle effektiv sein, aber
nicht auf Kopf oder Kehle zielen
Einfache Handhabung & kaum
Wartungsaufwand
Kann bis zu 6cm Kleidung
durchdringen, inkl. Leder &
EINIGE Schutzwesten
(Unterschiedliche Ergebnisse mit
Westen)
Große Abschreckung durch
Lichtbogen und Laser
Wirkt gegen Täter unter dem
Einfluß von Drogen oder Alkohol
Dataport, Zubehör und
Wartung
Maßnahmen zur rechtlichen
Absicherung
STUNGUNS: A LOOK 1!4. T E M26
Pollooarol.!incl the ootJ1ntry are ~j)r,Qr1l'1g
to subdll ng
dang.ar,ous suujects. Tas.er
Itrtern(l,t orlial's latest Sl.Ul1lgun title M26.
IS one suoh 'iH)apon. Ear.h M20; oosl.S
$400..
PRDBIES
illon-le1!tlalaltern(li~ives
lwo 1:J~lIb~c1llmI)es
fim from tfit~ Ml26
up to 21 fe~u,O
'del i"{:I 1!he- chal*,
I
.1'41
'I'
:Itu
..
·It
••1
~.1.1
..
...duD _
, ••1
'.11-' 11
IJ"W••
!,I1U
.1
The 'I$i;lrge ci;ll'll:Je
IhJoug)l
l~ inche$ of
clothing.
(lali~
DA1A~
p.oR.T
A1llo'll$ 81
i!;omp -,~r
t{lacce~:s
~e
•
AFID Identifikationssystem
– 20-40 Plättchen werden
von jeder Kartusche mit
verschossen
– Ermöglicht
Rekonstruktion, welcher
Beamte wo geschossen
hat
(li:schar*
historyo-f
~~ weapon.
Me my
i!;81n holl1
~eli~
an(l'da,te
of mom
~an
Sas.
(li:scha r$S.
BAnERIES
Operaleson 8M
baUelJes In ltJ.e
'iH)apoil's grip.
SCM.II;:CI;.S: t"""lf .m~nrllliiorn;;;; [litll"'l
Putlit Silreti Sull'lit1;
/Ja~'.!ls ,~tIl.l<J8 lieW'S ~
I
ta$e,. sighfing
TAGS
Jlny r:dernUf1oa'~JOii'l
rogs alreeleased
'Ii en Ute 'o'ea POfl
fs flre-d. EaGil'ltag
s rnalked wllth
'
l.I1.e senlal number
of tm.e ,caFU1dge
l.I1al~reclfQr greale
a'tco llnrob Jlty..
LAYNE - Mr V SIMi' Gr:l:JJlOC
Dataport
• Dataport
– Speichert Zeit und Datum jeder
Aktivierung (die letzten 585)
– Schützt Beamte vor
unbegründeten
Anschuldigungen
– Beamte können für Mißbrauch
verantwortlich gemacht werden
– Stets durch Gummistöpsel
schützen
– Erlaubt Fernauslösung
(Roboter)
Dataport
•
•
•
•
Hardware und Software sind Sonderzubehör
Windows® 95, 98, 2000 & NT kompatibel
Stromquelle ist eine separate Batterie
Speichert jeweils Uhrzeit und Datum der letzten
585 Betätigungen des Abzugs– nicht die Dauer der
Aktivierung
– Bei vollem Speicher werden die ältesten Daten
gelöscht durch die neuesten die gespeichert
werden
• Grundeinstellung ist Greenwich Standardzeit, bis
Ortszeit programmiert wird
Dataport Download Kabel
PC Interface Kabel
DAC Converter
M26 Interface Kabel
Dataport Benutzeroberfläche
I I
I
I
I
ADVAN CE D TAS ER Serial Interface
First a valid Communications port needs to be selected xxx
xxx A Valid Passord must be entered to interact with a Device
Communications port [CO M1] initialized
Your password has been verified
This operation will take about 45 seconds to complete
Data Format: MM/DDIYY HH:MM:SS Day
Line 001) 06/12/01 20:23:38, Tuesday
Line 002) 06/12/01 20:24:54, Tuesday
Line 003) 06/12/01 20: 25: 09, Tuesday
Line 004) 06/12/01 20: 25: 29, Tuesday
Line 005) 06/12/01 20: 25: 37, Tuesday
Line 006) 06/12/01 20: 25: 51, Tuesday
Line 007) 06/12/01 20: 26: 06, Tuesday
Line 008) 06/12/01 20: 26: 13, Tuesday
Line 009) 06/12/01 20: 26: 26, Tuesday
Line 01 0) 06/12/01 20: 51 :59, Tuesday
Line 011) 06/12/01 20: 52: 14, Tuesday
Line 012) 06/12/01 20: 52: 20, Tuesday
Line 013) 06/12/01 20: 52: 27, Tuesday
Line 014) 06/12/01 20:52:35, Tuesday
Line 015) 06/12/01 20: 52:41 Tuesday
Line 016) 06/12/01 20:52:50, Tuesday
Line 017) 06/12/01 20: 53: 01, Tuesday
xxx
Enter Password
Clear Screen
HELP
.
c.-".-,,··
xxx
Batterieladegerät
Gelbes Licht = Stromversorgung
Rotes Licht = Ladevorgang
Grünes Licht = Laden beendet
Batterieladegerät
Batterien können direkt im Handgerät
oder in der Ladestation geladen werden.
Wird beides genutzt, erfolgt das Laden
nacheinander, nicht gleichzeitig.
Direktes Laden des ADVANCED TASER
Ladestation
Batterieladegerät
• Das intelligente Ladegerät lädt nur soviel, wie der
tatsächliche Ladezustand der Akkus vorgibt
• Das Ladegerät erhält durch Abgabe geringer
Ströme nach dem Aufleuchten des grünen Lichtes
nur noch den Ladezustand, um ein Überladen zu
verhindern
– Fertiggeladene Batterien entfernen
• Die Akkus im ADVANCED TASER laden zuerst,
danach die in der Ladestation
• NiMH-Akkus alle 2 Wochen laden
• Pfropfen wieder in die Ladebuchse des M18
stecken, wenn Ladevorgang beendet ist
Wartung/Pflege
• Fallenlassen vermeiden - sensibles, teures,
elektronisches Gerät (wie Handy behandeln)
• Batterien regelmäßig überprüfen
• Verfalldatum der Kartuschen regelmäßig überprüfen
• Der Gummipfropfen muß in der Ladebuchse stecken,
wenn diese nicht gerade genutzt wird
• Nur vom Hersteller zugelassene Akkus oder
Batterien verwenden
• Sicher aufbewahren, wenn ungenutzt
• Nur im geeigneten Holster führen
• Nicht ohne Holster in Taschen der Bekleidung tragen
Reinigung/Pflege
• Der Kartuschenschacht sollte ab und zu mit einem
trockenen Tuch ausgewischt werden, da das Verschießen
vieler Kartuschen geringfügige Rückstände hinterläßt (vor
allem nach umfangreichen Ausbildungsveranstaltungen).
Sonstiges
• TASER-Zielscheiben nutzen sich nach mehreren Schüssen
schnell ab
– Man sieht, daß die weißen Linien nach jeder Aktivierung
breiter werden
• Um die Lebensdauer der Scheiben zu verlängern nicht immer auf
die Ringe im Zentrum zielen.
Funktionsfähig
Keine Lichtblitze mehr
(Klick auf die Bilder startet Videos)
Zusammenfassung
• Reduziert Verletzungen bei Beamten UND
Tätern
• Am effektivsten bei Ausstattung der
Streifenbeamten
• “Saubere” Lösung (auf beengtem Raum)
• Keine Auswirkung auf Unbeteiligte
• Elektrischer Strom + Laser = Abschreckung
• Reduziert rechtliche Risiken
• Niedrige Kosten je Einsatz
Gibt es
Fragen?
Abschlußbesprechung
&
Test
Weitere Informationen:
International: www.TASER.com
Deutschland: www.AirTaser.de
Exklusivvertretung für Deutschland
Lars Lipke Waffenhandel
Röntgenstr. 9, 42489 Wülfrath
Tel.: 49-(0)2058-910302
Fax.: 49-(0)2058-910301
Info@AirTaser.de
DVD INSTRUCTIONS
The TASER International Version 14.0 Training DVD can be run on a PC with a DVD-ROM.
1. The DVD contains:
• Power Point Presentations of :
a. The M/X 26 instructor course
b. The M26 user course
c. The X26 user course
d. Combination M26/X26 user course
e. One command demo
f. Corrections course
g. Gulla’s Angled Drive stun
h. Scenario Worksheet guide
• A Video Library
• Training Documents
• Support Materials
NOTE: Your PC must have a DVD-ROM to read and interact with the disc. If your PC
only has a CD-ROM, it will not be able to read the disc.
2. Running Version 14 materials on a PC
• Insert the Version 14 disc into your PC’s DVD-ROM drive
• If your Auto-play is activated on your PC a “pop-up” window will ask you what action
you would like to take. Select “Open folder to view files” to view all contents of the
Version 14 disc.
• If auto-play is not activated, go to “My computer” and double click the DVD-ROM icon
to view the Version 14 disc contents. The training PowerPoint’s are located in the “V-14
Presentations and materials” folder. Here you can select the PowerPoint you need.
3. Downloading training materials to a PC (This is highly recommended as the
PowerPoint’s run smoother)
• Insert Version 14 disc into your PC’s DVD-ROM drive.
• If auto-play is activated on your PC a pop-up window will ask what action you would
like to take. Select “Open folder to view files” to view all contents of the Version
14 disc.
• If auto-play is not activated, go to “My Computer” and double click on the DVDROM icon to view the Version 14 disc contents.
• Using your mouse right click and hold the “V-14 Data Files” and drag and drop the
folder onto the desktop or a destination of your choice on your PC. This will copy
the entire contents onto your hard drive. The PowerPoint’s are located in the “V-14
Presentations and Materials” folder. From there you can select the PowerPoint you
need.
NOTE: If copying the DVD training programs to a hard drive, you must copy the
entire training folder. If the entire folder is not moved, the PowerPoint presentations
will be unable to “link” to the video clips in the PowerPoint.
4. Instructor Course: This is the course used by Master Instructors to train instructors as part
of the 16-hour instructor course.
5. User Courses: User courses are provided for both the M26 and the X26 as separate courses
and a combined course. They are to be used by TASER International certified instructors to
train end users. Instructors are encouraged to add department policies and tactics as part of
the course material.
6. Command Demos: The single demo provides assistance for instructors in conducting
command demos.
7. Corrections Course: This folder contains a PowerPoint presentation which addresses the
specific areas of Corrections and is to be used as an addition to the Instructors and user
courses. The folder also contains Corrections videos.
8. Gulla’s Angled Drive Stun: This PowerPoint shows how the drive stun may be more
effective if used on an “angle” to create NMI in a 3 point deployment.
9. Scenario Worksheet Guide: This presentation gives instructors guidance for setting up and
running Live Simulation scenarios.
10. Video Library: The associated video clips will play automatically when the instructor
“clicks” the mouse on the appropriate PowerPoint slide. In addition, you can play a specific
video clip at any time by clicking on the video icon in this folder.
11. Training Documents: This folder contains documents used in the instructor certification
course, including tests, answer keys, user and instructor applications, pre-deployment
checklists, checklists to be used before and after training courses, certificates, and forms that
must be completed and returned after each instructor’s course.
12. Supplemental Materials: This folder contains multiple sub-folders with additional
information that may be valuable to instructors, users, and their departments. Instructors
should refer to these documents, as there are multitude of resources for training, ineffective
use analysis, in custody death information, model policies from PERF and the IACP, and
much more.
INSTRUCTOR PREPARATION CHECKLIST
Always check the Law Enforcement/Training link at www.TASER.com within 72 hours before
your class to ensure you are using the proper lesson plan and to review all Training Bulletins.
Also, every Master Instructor is required to get in touch with the contact person from the hosting
agency at least one week prior to the training to confirm all details regarding the class and
facilities.
Essential Equipment Required For Training:
•
•
•
•
•
•
Classroom suitable for size of class
Proper mats
Power strip & extension
Computer with DVD/ROM or a DVD player.
Speakers
PowerPoint compatible computer with PowerPoint 2003 minimum software
Ensure the computer can successfully play the PowerPoint AND that the videos PLAY
onscreen via the projector prior to the course.
Media Player 10.0 is required to play the videos. Suggest making Media Player the
default media player
If you don't have Media Player, you can download this for free at:
http://www.microsoft.com/windows/windowsmedia/players.aspx
Internet Explorer 6.1 or greater
•
•
•
•
•
•
Projector
White board to project upon and for writing or drawing if necessary
First aid kit with multiple bandages, rubber gloves and alcohol wipes
Corkboard or suitable backdrop for firing stations
TASER equipment
TASER devices
TASER Cartridges
Targets
Safety glasses
Lesson Plans
TASER Simulation Suit
Latest version of the training DVD
Preprint the appropriate Answer Key for the test to be used during the class. Suggest having
students grade each other's tests to expedite the grading.
© 2007 TASER International, Inc. TASER®, Shaped Pulse™ and the Globe & Lightning Bolt Logo are trademarks of TASER International, Inc.
INEFFECTIVE DEPLOYMENT QUESTIONS
•
•
•
•
•
•
•
•
•
Obtain as much info as possible from the actual operators regarding the incident
Immediately contact TASER Int’l for guidance and assistance: Andrew Hinz or Matt Grimm at 800-978-2737 x 2048
or 6338 or Andrew@TASER.com or mgrimm@TASER.com
Circumstances regarding arrest
Distance fired, probe spread, location and duration of cycles
TASER ECD effects (any change in behavior?)
Subject’s influence (drugs, alcohol, EDP)
Any other use of force used?
Hospital or medic exam information (if conducted)
Take time to analyze the situation and the potential causes of ineffective deployment prior to drawing any conclusions
MEDIA INFO:
•
•
•
Prepare media statement and provide media with as much info about TASER non-lethal weapons if possible
Provide media the following contact info: www.TASER.com
Steve Tuttle, TASER International’s Vice President of Communications at 800-978-2737 x 2006 &
Steve@TASER.com
Should an ineffective use occur, the following should be answered:
•
•
•
•
•
•
•
•
•
•
•
•
•
•
•
•
•
•
•
•
•
•
•
•
•
•
•
What was the subject behavior and demeanor prior to use of force?
Did the operator hear the TASER deploy? Was it loud or quiet?
Distance from TASER operator to subject?
Location of probes on the body?
Did the probes penetrate skin?
What type of clothing was on the subject?
Distance between probes?
Did the TASER ECD change the subject's behavior?
How?
Was the subject incapacitated?
What was the subject's reaction after the TASER cycle?
Were attempts made to apprehend subject during TASER cycle?
If not, why?
Were other control techniques used such as hands on, pepper, baton, K-9, etc?
If yes, what was the subject's reaction to these techniques?
Were any additional cycles applied (how many?) to the same Air Cartridge probes or were additional cartridge(s)
fired?
Was there an Air Cartridge loaded in the secondary cartridge carrier?
Was a separate TASER ECD deployed?
Did the subject pull the probes out?
If yes, after the cycle?
If no, did the subject break the wires or were the stepped on or tangled up on the subject?
Was the Air Cartridge taken as evidence?
What was the pulse rate of the M26 or X26 (strong and fast, slow and dying?)
Was the TASER cycle loud during the cycle?
What type of batteries were used? (NiMH or alkaline if M26)
Was a dataport download conducted and saved?
Was a drive stun application attempted? If yes, what area of the body was this applied?
© 2010 TASER International, Inc. TASER®, Shaped Pulse™ and the Globe & Lightning Bolt Logo are trademarks of TASER International, Inc.
SUPERVISORY TASER USE REPORT
Date/Time: _________________ TASER Officer’s Name: _______________________________
E-mail: ____________________________ Department: ________________________________
Dept Address: __________________________________________ Phone: ________________
On Scene Supervisor: ___________________Officer(s) Involved: _________________________
®
TASER Model (check one): ___ TASER X26 ___ ADVANCED TASER M26
If an ADVANCED TASER M26 Was Used, What Battery Type: ___ Alkaline ___ NiMH Rechargeable
TASER Cartridge Type(s):
___ 21-ft Standard ___ 21-ft XP ___ 25-ft Standard ___ 25-ft XP
___ 35-ft XP ___ 15-ft
TASER Serial #: _____________ Medical Facility: _____________ Doctor: ________________
Nature of the Call or Incident: _______________ Charges: __________________ Booked: Y / N
Type of Subject: ___ Human
___ Animal
Location of Incident: ( ) Indoor ( ) Outdoor ( ) Jail ( ) Hospital
Type of Force Used (Check all that apply):
( )Physical ( )Baton ( )Impact Munition
( )Chemical ( ) Firearm
Nature of the Injuries and Medical Treatment Required: _________________________________
Admitted to Hospital for Injuries: Y / N
Medical Exam: Y / N
Admitted to Hospital for Psychiatric: Y / N
Suspect Under the influence: Alcohol / Drugs (specify): ______________
Was an officer/law enforcement employee injured other than by TASER? Y / N
Incident Type (circle appropriate response(s) below):
Civil Disturbance
Suicidal
Suicide by Cop
Violent Suspect
Barricaded
Warrant
Other
Age: _______ Sex: _______ Height: _______ Race: _______ Weight: _______
Was a TASER CAM in use? Y / N
TASER use (circle one): Success / Failure
Suspect wearing heaving or loose clothes: Y / N
Number of cartridges fired: _________
Number of cycles applied: ___________
Usage (check one): ( ) Arc Display Only
( ) Laser Display Only
( ) TASER Application
TASER: Is this a dart probe contact: Y / N
Is this a drive stun contact: Y / N
Approximate target distance at the time of the dart launch: _____________ feet
Distance between the two probes: ___________ inches
Need for an additional shot? Y / N
Did dart contacts penetrate the subject’s skin? Y / N
Probes removed on scene: Y / N
Did TASER application cause injury: Y / N If yes, was the subject treated for the injury: Y / N
DESCRIPTION OF INJURY:
____________________________________________________________________________________
____________________________________________________________________________________
____________________________________________________________________________________
____________________________________________________________________________________
APPLICATION AREAS
(Place “X’s” where probes hit suspect AND “O’s” where stunned)
SYNOPSIS:
____________________________________________________________________________________
____________________________________________________________________________________
____________________________________________________________________________________
____________________________________________________________________________________
____________________________________________________________________________________
____________________________________________________________________________________
Need for additional applications? Y / N Did the device respond satisfactorily? Y / N
If the TASER deployment was unsuccessful was a DRIVE STUN followup used? Y / N
Describe the subject’s demeanor after the device was used or displayed?
____________________________________________________________________________________
____________________________________________________________________________________
____________________________________________________________________________________
____________________________________________________________________________________
Chemical Spray: Y / N
Baton or Blunt Instrument: Y / N
Authorized control holds: Y / N
If yes, what types: ____________________________________
Describe other means attempted to control the subject: ____________________________________
Photographs Taken: Y / N
_________________________________
Report Completed by:
_________________________________
ADDITIONAL INFORMATION
____________________________________________________________________________________
____________________________________________________________________________________
____________________________________________________________________________________
____________________________________________________________________________________
____________________________________________________________________________________
1.
2.
3.
4.
Save this file to your hard drive and for your department archives.
Submit this report to the national TASER technology incident database.
Results of uses are reviewed by TASER Int'l to adjust training issues and concerns as well.
Email this copy to Andrew@TASER.com. If you cannot email, please fax a copy of this report to:
(480) 991-0791 Attn: Andrew Hinz (Ph: 800-978-2737 ext. 2048).
ADVANCED TASER® Pre-Deployment Checklist
____
Develop Department Deployment Policy
An example policy is included on the TASER International CD-ROM. While this policy may be
used to form the basis of your department policy, department management should ratify and
modify the policy for your department's specific requirements.
____
Develop Use of Force Guidelines
An example policy is included on the TASER International CD-ROM. While this policy may be
used to form the basis of your department policy, department management should ratify and
modify the policy for your department's specific requirements.
____
Develop Supervisory ADVANCED TASER Use Report
An example report is included on the TASER International CD-ROM. While this report may be
used to form the basis of your department policy, department management should ratify and
modify the policy for your department's specific requirements.
____
Brief Relevant Community Services
It is recommended to notify relevant interest groups in the community prior to or concurrent with
ADVANCED TASER deployment. The following community groups should be considered:
•
•
•
•
Fire Battalion Chief
EMTs
Local Hospital Staff
Media
TASER International, Inc. personnel are available to assist in media relations. Media education
prior to deployment will serve the department best by ensuring more accurate understanding of
the ADVANCED TASER and the reasons for its deployment. Further, media education
provides an opportunity to educate the public about the steps the department has
undertaken to reduce liability and injuries to both officers and suspects.
____
•
•
•
Establish File for ADVANCED TASER / ADVANCED TASER Certifications
All officers must pass certification course prior to deployment of ADVANCED TASER. Signed
certification test must be kept on file for all officers using the ADVANCED TASER. All certified
officers should receive printed copies of the following documents at time of certification:
Department Deployment Policy
Use of Force Guidelines
Supervisory ADVANCED TASER Use Report
____
Establish File for ADVANCED TASER Use Reports
Every use of the TASER technology should be documented using the department's established
report (as modeled in the training manual). If possible, part of the filing procedure should include
a fax of the report to TASER International to establish a national usage database that will be
submitted to the International Association of Chiefs of Police Use of Force Database. Fax to 480991-0791, attn: Law Enforcement Affairs. Please mark reports as confidential and strike
names as appropriate.
U:\taser\Version 9.0\Documents for 9.0\Product Info\Predeployment_Checks.DOC
PROTECT
L
I
F"
E
TASER® X26 / M26 Pre-Deployment Checklist
____
Develop Department Deployment Policy
Example policies are available from TASER International. While these policies may be used to form
the basis of your department policy, department management should ratify and modify the policy for
your department's specific requirements.
____
Develop Use of Force Guidelines
Example policies are available from TASER International. While these policies may be used to form
the basis of your department policy, department management should ratify and modify the policy for
your department's specific requirements.
____
Develop Supervisory TASER X26 / M26 Use Report
An example report is included on the TASER Int'l training DVD. While this report may be used to form
the basis of your department policy, department management should ratify and modify the policy for
your department's specific requirements.
____
Brief Relevant Community Services
It is recommended to notify relevant interest groups in the community prior to or concurrent with
TASER device deployment. The following community groups should be considered:
•
•
•
Fire Battalion Chief, EMTs and Local Hospital Staff
Media and agency spokesperson/PIO
Civilian Police Review Board, Police Commissions, and/or City Councils/County Supervisors
TASER Int'l, Inc. personnel are available to assist in media relations. Media education prior to
deployment ensures more accurate understanding of the TASER technology and the reasons for its
deployment. Media education provides an opportunity to educate the public about your
department's steps undertaken to reduce liability and injuries to both officers and suspects.
____
•
•
•
Establish File for TASER Certifications
All officers should pass a certification course prior to deployment of TASER devices. Signed
certification tests should be kept on file for all officers using the TASER devices. All certified officers
should receive printed copies of the following documents at time of certification:
Department Deployment Policy
Use of Force Guidelines
Supervisory TASER Electronic Control Device Use Report
____ Establish File for TASER X26 / M26 Use Reports
All TASER device uses should be documented using the department's established report. This procedure should
include online entry of the TASER Int'l use of force submission at www.TASER.com website. If you do not
have access to the Internet, please fax a copy of the report to TASER Int'l at 480-515-6363, Attn: Gov't Affairs.
This data drives the changes in the next training DVD based upon lessons learned from actual use. In addition,
this data is used to establish a national usage database submitted to the National Tactical Officers Assn (NTOA)
Use of Force Database. Please mark reports as confidential and strike names as appropriate.
© 2007 TASER International, Inc. TASER®, Shaped Pulse™ and the Globe & Lightning Bolt Logo are trademarks of TASER International, Inc.
SUPERVISORY
TASER International USE REPORT
®
Subject’s
Name_______________________________________________Date/Time_______________
Location______________________________________________________Booked: Y / N
Where _____________________ Charges___________________________________________
Officer’s Name ___________________________________ Sgt. _________________________
Lt. _____________________________________________ AIR TASER Serial # ___________
Medical Facility___________________________________Doctor ______________________
OR#: ______________________________ Fire DR#: ________________________________
Date of the Incident: _________________ Time of Incident: __________________________
Location of the Incident: _______________________________________________________
Officer(s) Involved: ____________________________________________________________
Nature of the Call or Incident: __________________________________________________
Type of Force Used (Check all that apply): ( ) Physical ( ) Less-lethal ( ) Firearm
Nature of the Injuries and Medical Treatment Required: ____________________________
Admitted to Hospital for Injuries: Y / N
Admitted to Hospital for Psychiatric: Y / N
Medical Exam: Y / N
Suspect Under the influence: Drugs / Alcohol
Summary of the Actions of Officer(s) Involved: ____________________________________
Was an Officer, Police Employee, Volunteer or Citizen Injured? Y / N
Incident Type {Circle appropriate response(s) below}:
Civil Disturbance
Suicidal
Violent Suspect.
Barricade
Warrant Service.
Other.
TASER INTERNATIONAL LESSON PLAN p. 1
Age: _____ Sex: _____ Height: _____ Race: _____ Build: ( ) Heavy ( ) Med. ( ) Trim
Suspect wearing heaving clothes: Y / N
Actual TASER application: _____ Arc Display Only _____ Display Only _____
TASER: Is this a dart probe contact: Y / N. Is this a stun gun contact: Y / N
TASER® weapon used: ( ) AIR TASER 34000-series ( ) ADVANCED TASER M-series
Approximate target distance at the time of the dart launch:
____________________________________________________________________________
Need for an additional shot? Y / N
Did dart contacts penetrate the subject’s skin? Y / N
TASER: Did the application cause injury: Y / N. If yes, was the subject treated for the
injury: Y / N.
DESCRIPTION OF INJURY:
________________________________________________________________________________
________________________________________________________________________________
____________________________________________________________________
APPLICATION AREAS - Points of contact
SYNOPIS:
_______________________________________________________________________________________________
_______________________________________________________________________________________________
_______________________________________________________________________________________________
_______________________________________________________________________________________________
TASER INTERNATIONAL LESSON PLAN p. 2
_______________________________________________________________________________________________
_____________________________________________________________________________
Need for additional applications? Y / N
Did the device respond satisfactorily? Y / N
Describe the subject’s demeanor after the device was used or displayed?
________________________________________________________________________________
________________________________________________________________________________
________________________________________________________________________________
________________________________________________________________
Was the subject under the influence of drugs or alcohol? (confirmed by)
________________________________________________________________________________
________________________________________________________________________________
________________________________________________________________________________
________________________________________________________________
Describe the danger present:
________________________________________________________________________________
________________________________________________________________________________
________________________________________________________________________________
________________________________________________________________
Describe other means attempted to control the subject: (If not used, explain)
Chemical Spray:
________________________________________________________________________________
________________________________________________________________________________
____________________________________________________________________
Baton or Blunt Instrument:
________________________________________________________________________________
________________________________________________________________________________
____________________________________________________________________
Authorized control holds:
________________________________________________________________________________
________________________________________________________________________________
____________________________________________________________________
Photographs Taken (yes) (no)
If not, explain:
TASER INTERNATIONAL LESSON PLAN p. 3
________________________________________________________________________________
________________________________________________________________________________
____________________________________________________________________
Fire Department Report # _______________________________________________
Report Completed by:
_______________________________________________
ADDITIONAL INFORMATION
________________________________________________________________________________
________________________________________________________________________________
________________________________________________________________________________
________________________________________________________________________________
________________________________________________________________________________
________________________________________________________________________________
________________________________________________________________________________
________________________________________________________________________________
________________________________________________________________________________
________________________________________
TASER INTERNATIONAL LESSON PLAN p. 4
Training Weapon Malfunction
Report
TASER International maintains a specific inventory of training weapons. These weapons are
exposed to extremely high levels of use including multiple continuous firings, dropping, shipping
damage, etc. If you have a weapon that does not perform properly in class, please submit this form
(with as much detail as possible) in the box with the returned weapons so we can ensure the
weapon is not sent to another class without the necessary repairs.
Master Instructor:
Date:
Class Location:
Weapon Serial #:
Type Weapon (circle one)
M26
X26
Type Weapon (circle one)
M26
X26
Type Weapon (circle one)
M26
X26
Type Weapon (circle one)
M26
X26
Type Weapon (circle one)
M26
X26
Details:
Date:
Class Location:
Weapon Serial #:
Details:
Date:
Class Location:
Weapon Serial #:
Details:
Date:
Class Location:
Weapon Serial #:
Details:
Date:
Class Location:
Weapon Serial #:
Details:
TR-FORM-TRWMALF-001 Rev: A
July 6, 2007
Copyright© 1999–2007 TASER International, Inc. All Rights Reserved
Page: 1 of 1
TASER® International
Training Weapon Malfunction Report
Taser International maintains a specific inventory of training weapons. These weapons are
exposed to extremely high levels of use including multiple continuous firings, dropping,
shipping damage, etc. If you have a weapon that does not perform properly in class, please
submit this form (with as much detail as possible) in the box with the returned weapons so
we can ensure the weapon is not sent to another class without the necessary repairs.
MASTER INSTRUCTOR:
DATE:
CLASS LOCATION:
WEAPON SERIAL #:
TYPE WEAPON (circle one) M26 X26 X3
Details:
WEAPON SERIAL #:
TYPE WEAPON (circle one) M26 X26 X3
Details:
WEAPON SERIAL #:
TYPE WEAPON (circle one) M26 X26 X3
Details:
WEAPON SERIAL #:
TYPE WEAPON (circle one) M26 X26 X3
Details:
WEAPON SERIAL #:
TYPE WEAPON (circle one) M26 X26 X3
Details:
©Copyright 1999-2010 TASER International, Inc. All Rights Reserved
TASER® Unintentional
Discharge/Injury Report
NOTE: This form must be completed by the Master Instructor for ANY injury to instructors,
students, or observers received during the conduct of a TASER International instructor
course. Contact the TASER International Training Coordinator at 1-800-978-2737 and
report the incident as soon as possible, then fax this report to 480-905-2034 Attention:
Training Coordinator.
Master Instructor Name:
Date of Incident:
Class Location:
Name of Injured Party:
Injury Occurred During (Circle One):
Classroom
Voluntary Exposure
Firing Drills
Scenarios
Type of Injury:
Specific Points of Probe Impact (If Applicable):
Describe in detail how the injury happened. Please be as detailed as possible and use the
back of this form if necessary:
What treatment, if any was provided in class, or was any outside medical attention
received:
How can this type of injury be prevented in the future?
List witnesses to the incident on the back of this form.
TR-FORM-INCID-001 Rev: A
June 1, 2007
Page: 1 of 1
© 1999–2007 TASER International, Inc. All Rights Reserved. The Globe & Lightning Bolt logo is a trademark of TASER International, Inc.
PRODUCT SPECIFICATION SHEET
Model:
Model #:
Power output:
Power input:
Power supply:
Aiming mechanism
Mechanical:
Optical:
Housing
Dimensions:
Material:
Safety levers:
Material:
Activation switch
Material:
Laser lens
Material:
Other features
On board memory:
Battery indicator:
Yellow coloration kit:
Air Cartridges:
M26 ADVANCED TASER®
44000
50,000 Volt (est.); 26 Watts; 162mA (Irms) and 1.76 Joules per pulse energy
12 VDC: 4-6 A
8 AA Nickel Metal Hydride (NiMH) 1.2-Volt rechargeable batteries or hi-output
1.5-Volt alkaline batteries, self-contained inside polyethylene battery tray, with
reverse insertion prevention feature.
Fixed front and rear “fin and blade” sights, optimized at 13 foot range.
650 Nm vawelength, daytime laser sight, optimized at 13 foot range.
6.5” x 1.4” x 5.9” (inches).
Bayblend T 85 MN 901510 (PC/ABS Blend).
molding process.
Ambidextrous safeties
Bayblend T 85 MN 901510 (PC/ABS Blend).
molding process.
No mold release used during
No mold release used during
High durability black Santoprene, shore A
Optically clear polycarbonate.
Fast recording EEPROM chip records 585 firings, date and time.
High visibility red LED calibrated for alkaline batteries.
Left and right side yellow polycarbonate decals with P.S.A. that adheres to
sides of the weapon, in order to mark it as less-lethal.
21-foot and 15-foot interchangeable cartridges made of polycarbonate plastic.
Uses 1800 P.S.I. compressed nitrogen. Wire is proprietary insulated copperclad steel.
UNLOADED
LOADED W/ AIR CARTRIDGE
6.5
7.7
5.9
6.7
4.3
5.1
1.4
7860 E. McClain Drive, Suite 2 * Scottsdale, AZ 85260 USA * 480-991-0797 * Fax 480-991-0791 * www.TASER.com
FAQ about AA Batteries and Battery Chargers
®
Is battery selection really important? Yes. The ADVANCED TASER is a powerful device requiring high drain
batteries. Batteries are run at their maximum capacity by the ADVANCED TASER and are critical to the success of the
®
®
®
stopping power. After extensive testing, we recommend Energizer ACCU , GP , & TASER brand Nickel Metal Hydride
(NiMH) rechargeable batteries as the single most powerful types of batteries available. Alkaline batteries are the second
recommended types of battery. Duracell Ultra® and Energizer Titanium E2® are the approved alkaline batteries for our
products and each has expiration dates. If non-approved alkaline or NiMH batteries are used, problems could arise.
Some NiMH batteries don't have complete exposure of their positive end. The battery springs may not completely
contact and could result in malfunction.
Shouldn't Heavy-Duty or Super Heavy-Duty batteries work? No. Unfortunately many terms used by the battery
industry can be very misleading. “Heavy Duty” batteries are often the least powerful batteries you can buy and are a step
down in quality. The term used to refer to zinc chloride batteries that had 50% more capacity than traditional carbon zinc
batteries -- but that was 50 years ago! Calling zinc chloride batteries heavy duty became misleading once alkaline
batteries with 300% more capacity than zinc chloride batteries became available. Stick with factory recommended
batteries.
Will installing the batteries wrong do any damage to the ADVANCED TASER? Yes. If all batteries are installed in
reverse you can actually reverse polarity of the unit and short it out. Even if only one battery is installed incorrectly you
will experience weapon failure and rapidly drain the power of these batteries. Instruction diagrams are on the inside of
each battery tray. It is very important to follow those instructions. Insert the batteries using the "V-shape" technique as
noted in the manual.
How many AA batteries do I need? 8 AA alkaline or NiMH rechargeable batteries are required to operate. It is also
®
2®
recommended that you keep a spare set of Duracell Ultra or Energizer Titanium E available.
What is the real world difference between alkaline and NiMH batteries in the ADVANCED TASER? Fresh Duracell
Ultra® or Energizer Titanium E2® batteries will provide a rate of 12-15 electrical pulses per second. Fully charged NiMH
batteries provide a rate of 15-20 pulses per second. NiMH batteries give the strongest output, and perform much better
in cold weather. However, undercharged batteries will cause weapon failure. Battery failures with rechargeable batteries
in older TASERs have resulted in escalation of force because officers had to move up the use of force continuum. The
recommended alkaline batteries have a stronger shelf life (4-6 years). Again, the selection of the battery is very
important. The trade off is better pulse rate versus maintaining a fully charged set of NiMH batteries.
Alkaline batteries are 1.5 Volts and the NiMH batteries are rated at 1.2 Volts, why the difference? NiMH batteries
are ideal substitutes for most high drain electronics. There is no need to worry about the apparent voltage differences.
Even though alkaline batteries are rated at nominal 1.5 Volts, they only deliver 1.5 Volts when they are fresh. In fact,
over the course of their discharge, alkaline batteries actually average about 1.2 Volts. The main difference is that an
alkaline battery starts at 1.5 Volts and gradually drops to less than 1.0 Volts. NiMH batteries stay at about 1.2 Volts for
most of their discharge cycle.
Should I be concerned about the mAh (milli Amp hours) rating? Yes, but only when considering NiMH batteries.
Alkaline batteries typically have a capacity rating of over 2,500 mAh and NiMH have rated capacities of only 1,200 to
1,800 mAh. But, when actually powering an electronic device like the ADVANCED TASER, the NiMH batteries will run
the device for two to three times longer. Alkaline batteries were not designed to meet the very high power demands of
today's electronic devices. Alkaline batteries have a high rated capacity, but they can only deliver their full capacity if the
power is used slowly. With NiMH batteries, the higher the mAh number, the longer the charge will last. Also, the higher
the mAh number, the higher the price! A rating of 1200 mAh is more than sufficient and ratings of 1400, 1600 and 1800
just increase the length of the recharge.
What is the self-discharge rate of alkaline and NiMH batteries? Alkaline batteries stored at "room temperature" (70
degrees F) self-discharge at a rate of less than two percent per year. However, if they are stored at 85 degrees F they
lose about 5% per year, but at 100 degrees F they lose 25% per year. NiMH batteries self-discharge at a much faster
rate than alkaline batteries. In fact, at "room temperature" NiMH batteries will self-discharge approximately one percent
per day. This is the primary reason behind our recommended two-week check and charge schedule.
Because the voltage of an alkaline battery drops at a very predictable rate it's possible to estimate the amount of capacity
left in an alkaline battery based solely on its voltage. (1.5 Volts - fully charged, 1.25 Volts - 50% charged, 1.0 Volts almost fully discharged). But a NiMH battery stays at about 1.2 Volts until it is nearly completely discharged.
Page 1 of 2
This makes it almost impossible to know the amount of capacity left based on its voltage alone. It also leaves you very
little warning when it's time to change your batteries! Moreover, the NiMH will provide little audible warning when they
are near their end of capacity. Alkaline batteries will begin to slowly fade out causing the pulse rate to diminish. The
NiMH’s will provide a rapid pulse and then rapidly plummet in pulse rate.
What is "memory effect" and should I be concerned? "Memory effect" is a term used when rechargeable batteries
experience voltage depletion (reduced capacity) over their life. In other words, the battery is not able to hold the same
capacity as it did the first time it was charged. This is true with all rechargeable batteries, but some have a very high rate
loss. NiMH batteries are virtually memory free and do not need to be fully discharged before recharging. Keep in mind
that this is the amount of charge the batteries will hold not the quality. NiMH batteries can be damaged from heat by
overcharging, but is easily avoided by using a high quality, microprocessor controlled battery charger such as our factory
recommended battery brands.
How many times can rechargeable batteries be recharged? The quick and easy answer is hundreds of times. The
reason we can't be more precise is because this is a more complex question to answer than it might seem. The number
of times a battery can be recharged depends on how the battery was used. Every time a rechargeable battery goes
through a charge and discharge cycle it loses a tiny bit of capacity. Not to mention if you accidentally overcharge the
batteries or if you repeatedly completely discharge them. Therefore, it would be impossible to give you an exact number.
Today’s NiMH will generally last 300 -1,000 charge / discharge cycles.
Does rapid charging reduce the life of batteries? No. So long as it is done using properly designed, "smart"
chargers, most NiMH batteries can be recharged in about an hour without any damage or reduction in their life.
However, NiMH batteries must be rapid charged with a charger specifically designed for charging NiMH batteries.
Chargers designed to charge only Nickel cadmium (NiCad) batteries can overcharge NiMH batteries. Even a standard or
slow NiCad charger can damage NiMH batteries. Many inexpensive NiMH battery chargers are simply NiCad chargers
that have been modified slightly. We do not recommend this type of charger. While it is less expensive to manufacture
than a smart charger, it can lead to overcharging and battery damage. Most NiMH "smart" chargers have actually been
designed to detect when a NiMH battery is fully charged and then shut off or go into a trickle charge mode. Because of
the more complex circuitry, this type of charger costs more to manufacture, but should lead to greater battery life.
Do I have to purchase a brand specific charger for my NiMH batteries? Any good NiMH charger should be able to
recharge any good quality NiMH battery without any problem. Just keep in mind that a "smart" charger is better than a
"dumb" charger. The TASER NiMH "smart" charger charges through the use of the dataport plug. This feature allows
you to charge the NiMH batteries without having to remove both the battery tray and each battery out. In addition, there
is also a place for a battery tray to charge in the base of the charger.
Can a battery charger damage a battery? Yes. The most common cause of premature battery failure is overcharging.
The chargers most likely to cause overcharging are the 5, 8, or 15-hour chargers. The problem with these chargers is
that they really don't have a charge control mechanism. Most of them are simple designs that charge at their full charge
rate for a fixed period of time through a timer, and then shut off or switch to a trickle charge rate. Each time the unit is
either unplugged or batteries are removed, the timer begins at zero and recharges the batteries for another lengthy
recharge.
If improperly used they can shorten a battery's useful life. Suppose that fully charged or partially charged batteries are
put into the charger. The charger has no way to sense this, so it will give the batteries a full charge it was designed to
deliver. Do this enough times with one of those battery chargers and the capacity of the battery will start to drop.
Why does my indicator light on the AVANCED TASER have a steady light when I use NiMH batteries? The
battery indicator light is calibrated for alkaline batteries (1.5 Volts per battery) and will not function properly with
rechargeables. Rechargeable NiMH batteries (1.2 Volts per battery) will always indicate 'low" even when full charged.
The battery indicator cannot distinguish between the 1.5 Volts and the 1.2 Volts. Since the unit was designed originally
with off-the-shelf batteries, the indicator measures for 12 Volts (8 X 1.5 = 12 Volts) as the maximum and indicates low
battery based upon a decrease from the 12 Volts. Freshly charged NiMH batteries start at 9.6 Volts (8 X 1.2 = 9.6 Volts)
and immediately register as low on the battery indicator, even though they are not low. To check the NiMH battery
strength, remove the Air Cartridge and check for a fast spark rate of 15-20 pulses per second. On alkaline batteries, if
the LED light is blinking, the batteries are good. If the LED is solid red, the batteries are low and should be changed.
The red light stops blinking when the charge drops below 70%. If there is no light at all or is barely visible, the batteries
are dead or have been installed improperly. Recheck that the batteries are installed properly.
About how many 5-second cycles can I get out of each type of battery (alkaline vs. NiMH)? Testing indicates
approximately 15-20 cycles out of a fresh set of approved alkaline batteries before a dramatic drop in battery
performance. The batteries may still fire the unit beyond that number, but at a reduced pulse rate. A fully charged set of
NiMH batteries provides approximately 100 cycles. But, it is important to keep in mind that you will not be given the
same type of pulse decline warning given by alkaline batteries. Number 101 could give you absolutely nothing!
Page 2 of 2
7860 E. McClain Drive, Suite 2 * Scottsdale, AZ 85260 USA * 480-991-0797 * Fax 480-991-0791 * www.TASER.com
“AA” Nickel Metal Hydride Battery Charger
Operating Instructions for Model: 44710
WARNING: READ THIS BEFORE USING
• Batteries must be charged prior to using.
• Charge only rechargeable Nickel Metal Hydride (NiMH) batteries in this device. Charging other types of
rechargeable Nickel Cadmium (NiCad) or non-rechargeable alkaline batteries may cause them to leak,
rupture or explode, resulting in personal injury and property damage.
• This device is intended for indoor use only.
• Avoid dropping the charger to prevent damage.
• Never connect the ADVANCED TASER to the charger unit with an Air Cartridge installed.
GENERAL INSTRUCTIONS
The charger unit includes: (1) power transformer, (1) base unit, (1) RJ11 dataport cable.
The battery charger is a four (4) hour “smart” charger. A fully drained set of NiMH batteries will take
no longer than four (4) hours to completely charge. The smart charger does not run on a timing cycle.
Because of the more complex circuitry, this charger is designed to detect when a NiMH battery is fully
charged and then shut off. If the NiMH batteries need only one (1) hour of charging, then that is all it will
take. This helps prevent overcharging damage to your batteries.
There are two methods for charging: Plugged directly into your ADVANCED TASER dataport, or with
the battery magazine placed in the charger base. In fact, you charge two sets of NiMH batteries
overnight – one in the weapon and another set in the charger. However, please note that the charger will
intelligently charge the weapon first and then the set in the charger.
The charger base unit is equipped with color-coded LED’s that indicate when power is on, when charging,
and when charging is complete. When the power transformer is plugged into the rear of the base unit,
the yellow LED light will illuminate. This indicates that power is being supplied to the charger and should
remain lighted the entire time the charger is plugged into the power source. To charge the ADAVANCED
TASER, remove the dataport rubber stopper. When you connect the charger unit to the dataport or place
a set in the base for charging, the red LED light will at first blink, indicating batteries have been connected
for charging. Once the charger verifies the batteries are “OK” to charge, the red LED will stop blinking
and remain on during the reconditioning and charging cycle. Once the batteries have fully charged the
red LED will turn off and the green LED light will illuminate. The green LED light indicates the batteries
are fully charged and the unit has stopped charging. Remember that the yellow LED light will continue to
illuminate the entire time the unit is plugged into the power source. Replace the rubber stopper in the
dataport when charging is complete.
• It is recommended to disconnect the ADVANCED TASER and/or remove the batteries from the charger
once the cycle has been completed.
• It is recommended to recharge the NiMH batteries every two weeks.
• It is normal for the bottom of the charger base to become warm during the charging cycle.
SPECIFICATIONS
Model:
Input:
Output:
Charge Time:
Battery Type:
44710
DC 15V 950mA from standard 110V house current
DC 9.5V – 14.5V
4 hours maximum
Nickel Metal Hydride (NiMH) ONLY
For more information, visit our website at: www.TASER.com or call 1-800-978-2737
“AA” Nickel Metal Hydride
Battery Charger Operating
Instructions Model 44710
WARNINGS
• Ensure the safety switch is in the ON (SAFE) position and the air cartridge is removed before connecting the
ADVANCED TASER to the charger unit. Verify that the wires (pins) are not bent, crossed or touching inside the data
port.
• The only valid indicator of adequate battery strength is a spark test. Perform a spark test per department policy.
• Never charge more than one set of batteries at a time. Use EITHER the battery tray charger base or the data port
adapter but not both at the same time.
• Charge only rechargeable Nickel Metal Hydride (NiMH) batteries in this device. Charging other types of rechargeable
batteries including Nickel Cadmium (NiCad) or alkaline batteries may cause them to leak, rupture or explode, resulting
in personal injury and damage.
GENERAL INSTRUCTIONS
• Batteries must be conditioned prior to use by charging three (3) separate times.
• NiMH batteries must be “reconditioned” every six months or after heavy use (e.g. a training session with multiple
firings).
• It is recommended to recharge the NiMH batteries at least once every two weeks.
• Always replace rubber data port stopper when charging is complete.
• This device is intended for indoor use only. Avoid dropping the charger to prevent damage.
• It is normal for the bottom of the charger base to become warm during the charging cycle.
• Yellow LED light indicates power is connected to the charger.
• Red LED light indicates batteries are recharging.
• Green LED light indicates batteries are fully charged.
The battery charger is a four (4)-hour “smart” charger. A fully drained set of NiMH batteries will take no longer than
four (4) hours to completely charge. The charger is designed to detect when a NiMH battery is fully charged and then
enter a trickle state. It does not work on a timing cycle. The green LED will illuminate as soon as the charger detects that
the batteries are fully charged. Since the smart charger will not overcharge the batteries, there is no requirement to
remove the batteries once charging is complete.
BATTERY INITIAL CONDITIONING AND RECONDITIONING (EVERY SIX MONTHS)
1. Verify the charger is powered (yellow LED illuminated).
2. Verify the M26 safety switch is in the ON (SAFE) position and the air cartridge is removed.
3. Remove the data port plug from the M26 and insert the charger cable OR remove the battery tray and insert in charger
base.
4. Verify the red LED illuminates to indicate batteries are recharging. The light will blink for a few seconds while the
charger verifies the battery connection, then illuminate steady for the remainder of the charging cycle.
5. Charge for a MINIMUM of 12 hours regardless of when the green LED illuminates.
6. Remove the batteries (or cable) from the charger for approximately 10 seconds (green LED extinguishes).
7. Reinsert batteries (or cable) and charge until the green LED illuminates.
8. Repeat steps 6 & 7 for one additional charging cycle.
NORMAL CHARGING
1. Verify the charger is powered (yellow LED illuminated).
2. Verify the M26 safety switch is in the ON (SAFE) position and the air cartridge is removed.
3. Remove the data port plug from the M26 and insert the charger cable OR remove the battery tray and insert in charger
base.
4. Verify the red LED illuminates to indicate batteries are recharging. The light will blink for a few seconds while the
charger verifies the battery connection, then illuminate steady for the remainder of the charging cycle.
5. When the green LED illuminates, the charging cycle is complete.
6. Replace the rubber stopper in the M26 data port.
SPECIFICATIONS
Model:
44710
Input:
DC 15V 950mA from standard 110V house current
Output:
DC 9.5V – 14.5V
Charge Time:
4 hours maximum
Battery Type:
Nickel Metal Hydride (NiMH) ONLY
For more information, visit our website at: www.TASER.com or call 1-800-978-2737. © 2005 TASER International, Inc.
TASER®, Shaped Pulse™ and the Globe & Lightning Bolt Logo are trademarks of TASER International, Inc.
EN-INST-BATCRG-001 Rev: A
August 15, 2005
Page: 1 of 1
This document contains proprietary and confidential information and may not be distributed
to others in any form, without written authorization from TASER International, USA.
This document is for training and reference only. The master copy is controlled in the document library.
7860 E. McClain Dr., Suite 2 * Scottsdale, Arizona 85260 * 800-978-2737 * Fax 480-991-0791 * www.TASER.com
ADVANCED TASER M26 & ACCESSORIES
ADVANCED TASER M26
DeSANTIS SWIVEL CLIP HOLSTER
Includes: Integrated Laser Sight,
Dataport, & Color Kit
Material: Kydex
Model #44000 (black)
Model #44005 (yellow)
POLICE AIR CARTRIDGE
Model #44810 (Right or Left)
Model #44811 (clip only)
DeSANTIS HIGH RIDE DUTY
HOLSTER
21-Foot Range (yellow/black door)
Material: Kydex
Model #44200 Single Shot
Model #44228 Box of 28
Model #44820 (Right) #44825 (Left)
Model #44821 (loop only)
TRAINING AIR CARTRIDGE
DeSANTIS NYPD DROP BAG
15-Foot Range (yellow door)
Material: Kydex
Model #34200 Single Shot
Model #34228 Box of 28
Model #44880
Model #44881 (clip only)
SECONDARY CARTRIDGE
HOLDER
THIGH HOLSTER
Material: Ballistic Nylon
Holds 1 Air Cartridge on the M26
(replaces standard battery cover)
Model #44830 (Right ) #44835 (Left)
Model #44831 (clip only)
Model #44860 (black)
DATAPORT DOWNLOAD KIT
WAIST PACK
Includes: Software & Adapter Windows 95 & 98 Compatible
Material: Nylon
Model #44840
Model #44500
NiMH BATTERY CHARGER
8 PACK NiMH BATTERY & TRAY
Capable of charging the M26
utilizing the dataport connection &
also a battery tray in the base
Specification: Recharable AA
1.2V
1500 mAh
Model #44710
Model #44700
ADVANCED TASER M26 - A New Era in Less-Lethal Technology
PRODUCT SPECIFICATION SHEET
Model:
ADVANCED TASER® M26 BladeTech Holster with thumb break and
TEK-LOK™ (locking, removable and adjustable belt clip mount).
Model #:
44855
Dimensions:
1.94” W x 7.5” H x 3.2” (inches).
Material:
Holster body is a proprietary blend of Polypropylene.
Thumb break extension is 8% glass filled Nylon.
TEK-LOK & TEK MOUNT is 33% glass filled Nylon
Thumb Break straps are Santoprene.
Thigh rig thigh plate is KYDEX.
Optional Air Cartridge carrier is KYDEX. (Soon to be of 8% glass
filled Nylon).
Other features:
TEK-LOC can mount duty and pant belts up to 2.27" in height and
is adjustable for smaller heights up. The width is .25"
Optional Air Cartridge carrier available in future.
TEK-LOK Patent
TEK-LOK U.S. Patent: 6145169 for locking, removable belt clip.
Patent Abstract:
A belt clip for supporting an object on a user's belt includes an inward
portion for insertion between the user's belt and body, having a first
hinge portion on one edge thereof and including a pair of spaced-apart,
flexible wings located at the other edge thereof, wherein each wing has
a first locking structure thereon; an outward portion for attaching an
object thereto, having a second hinge portion thereon and having a
second locking structure thereon; and a hinge pin for joining said first
hinge portion and said second hinge portion together in a moveable
condition.
TURBO CHARliE
Your ADUANCED lASER
Introducing the ADVANCED TASER®
NiMH Rechargeable Battery System
Save up to $8,000 in batteries*
Recharge & reuse batteries up to 1,000 times.
Improve TASER® Performance
Holds peak power for up to 100 discharges
(vs. only 10-15 for alkaline batteries)
Consistent performance in cold weather to -20 0 F
(alkaline batteries must be > 40 0 F for best results)
Convenient
Charge batteries in weapon through data port, or
Charge batteries in magazine, or
Charge both at the same time
Recharge once every two weeks
Intelligent quick-charge system charges in 1 to 4 hours
* Assumes $1 per battery for standard alkaline batteries, 8 batteries per magazine, up to 1,000 battery changes.
TASER" Certified Batteries
Unlike older Nickel-C3dmium (NK:ad) batt.... ies. the lASER Nickel Metal
Hydride (NiMH) batlenes -..ill ...-, develop a "OOOIIOl~ problem. You don't
haW! to ""OrTy about futy discharging baneries beIont..charglng. III lad.
!he TASa! ballefy thargef USGS an inteligenl llie1opooet_ to calibrate !he
baMries carefully 10 - - ' ~ and I!fl$U<l!! a quick, 3<X1r.I1e. lui
c:lI:atge - . , time. Fur1hef. lASER baltCty tenno\iIIt ... oertiIiIId ...... ,ipkai(
....." .... AlNAHCEOTA$€R bilttey~_ CAlJ1lON: Some other brand
NiMH b;ottl!'ries ~ Iuve a nono<:onductive Iltrmln.al_ ~ can calise
weapon failure.
Convenient Charging
'Ibu l3fl rech8fge 2 ways: P"Wed <lncttr ~ ycu' ACN'AHCEO TASER. or....m!he batlery m;>gllUICI placed in .... chargef.
po-, and .... iOIl"e S8I in tile ct>arver (!he charger .....
Color coded lED'$~ when ~ IS o n , - '
In lad. )IOU can c:hlorg8 lwo seIs of ba1l8f111S CMlrflIghl- one in !he"
elleligeoollycharge the WOO!X""Iirst. 1Ilen .... exn batt¥y ~ ) .
d'Ialg,"g. and when char'gWIg is ooo',,*,le.
TASER Battery Charger
Model #44710
Set of 8 TASER Batteries
Model #144700
Complete Rechargeable
TASER Battery System
Model #44705
Irw:UIes bIIllery dIarger base.
Inc*.Jdes 8 NiMH balteriel plus a
110 V
spiWe balleoy ~
powl!If
.. "' U"
»hsb mer (220 V
\.Ip(WI reqlMSt). and dab
CompaWe
-.. rroosl M NiMH BatlOOes.
pori ct.",.OU CiIIbIe.
8aIleMI
lOlled '" 1500 mNI M 1.2 V.
Temw>als are carefully '1+ ""4d
10 ...... oompatIllility ......
ADJANCED lASER.
TASER International, Inc.
IncllIdes 8 NiMH bailer;"", spare
-
ballety mBgiWIl$. c:t-gcr, -
!IansforfTw' and claIa port chargong
7860 E. McCl;)in DrMl. S<.rIe 112. SCOIl$da"'. Anzona 85260 USA.
(800) 978-2137 • (480) 905-2000' F3Jl (490) 991-0191
www.TASERcom·5alesOTASERcom
T"'~"'~""
CI :lOO'. TAst:R Io,""",","""
Ill<.
'no GloI>o & UII"nng loQo oro ~_ .. <JI T.o.$ER
"",<11._.
ADVANCED TASER M26
Field Use Reports Analysis
Overall Success Rate:
Total # Reports: 1645
SuccessRate: 94.59%
Success By Level of Deployment
Level
Success
Total
-
No
1
-
Yes
63
Darts Fired at Subject
No
63
Darts Fired at Subject
Yes
957
Laser Only
No
3
Laser Only
Yes
238
Spark Demo
No
1
Spark Demo
Yes
35
Stun Gun Application
Stun Gun Application
No
Yes
Distance of Firings
Distance
Number of
-
377
3-7 Feet
358
7-11 Feet
311
11-15 Feet
166
1-3 Feet
129
15-21 Feet
29
21
246
Success By Distance
Distance
Success
NUMBER
-
No
15
-
Yes
362
1-3 Feet
No
5
1-3 Feet
Yes
124
11-15 Feet
No
13
11-15 Feet
Yes
153
15-21 Feet
No
2
15-21 Feet
Yes
27
3-7 Feet
No
18
3-7 Feet
Yes
340
7-11 Feet
No
21
7-11 Feet
Yes
290
Length of TASER Discharge
Duration
-
# of
463
1 sec
9
2 sec
20
3 sec
31
4 sec
18
5 sec
443
B
More than one cycle
1
279
OC vs TASER
OC Performance
Effective
# of Incidents TASER Performance (Yes = Effective)
14 No
55 Yes
Ineffective
19 No
94 Yes
# of Shots Fired
Shots fired
#
1
902
2
59
2D
58
3
14
4
3
5
1
# of Probes That Hit Suspect
# of
# of
1
57
2
615
3
5
4
1
Types of Incidents Involving M26
Officer Assault
Warrant Service
Barricaded
Civil Disturbance
Suicidal
Resisting Arrest
73
93
99
191
267
483
4.44%
5.65%
6.02%
11.61%
16.23%
29.36%
Violent
531
32.28%
Suspect Force Levels of Incidents
Deadly Assault
Defensive Resist
Active Aggression
Verbally Non-Comp
34
346
453
467
Total Incidents
1300
2.6%
26.6%
34.8%
35.9%
Types of Suspect Weapons Involved in TASER Incidents
Blunt Weapon
Firearm
Edged Weapon
40
53
203
2.4%
3.2%
12.3%
% of Total Uses = 1,645
Suspect Influences
PCP
Misc. Drugs
Cocaine
Meth
EDP (Emotionally Disturbed Persons)
Alcohol
16
15
75
63
379
617
1.0%
1.0%
4.6%
3.8%
23.0%
37.5%
FAILURES – Stungun Mode
Failure Cause
Low Nerve / Muscle
# of Incidents
10
Weapon Problem
4
Low Battery
2
Miss
2
Clothing
1
Single Dart
1
FAILURE PROBLEMS - DARTS FIRED
Failure Cause
Clothing
# of Incidents
23
Single Dart
14
Miss
13
Unknown
10
Operator Error
6
Low Muscle Area
5
Low Nerve / Muscle
4
Low Battery
3
Animal Use
2
Cartridge Failure
2
Dropped / Broken
2
Propped Up
2
Door Closed
1
Weapon Problem
1
FAILURES: Of All Uses
Failure Cause
Clothing
# of Incidents
24
Miss
15
Single Dart
15
Low Nerve / Muscle
13
Unknown
10
Low Muscle Area
6
Operator Error
6
Low Battery
5
Weapon Problem
5
Decided not to use
3
Dropped / Broken
3
Animal Use
2
Cartridge Failure
2
Propped Up
2
Door Closed
1
Location of Incident
Location
# of Incidents
Indoor
405
Jail / Hospital
188
Outdoor
894
Suspect Injuries
Suspect Injury Level
# of Incidents
None
1443
Minor
176
Moderate
Severe
19
7
Officer Injuries
Office Injury Level
# of Incidents
None
1565
Minor
74
Moderate
5
Severe
1
Data Port User Manual
V.16
IT-INST-X26DPUM-001 Rev: D
October 26, 2006
Page: 1 of 42
This document contains proprietary and confidential information and may not be distributed
to others in any form, without written authorization from TASER International, USA.
This document is for training and reference only. The master copy is controlled in the document library.
X26 Data Port User Manual
TASER INTERNATIONAL, INC.
Version 16 Copyright 2000 - 2006
WARNING!!!
Note: Failure to follow safety precautions and instructions contained in this document may
result in serious injury and/or damage to equipment. TASER International, Inc. assumes no
liability for not following established procedures.
Pre-Installation Information:
•
Uninstall all previous versions of the X26 dataport software and FTDI USB drivers
before installing the latest version. See page 24 for instructions for Windows 98se
and Windows ME. See page 29 for instructions for Windows 2000 and Windows XP.
•
The installation is a two-step process. The X26 dataport software is installed first
and followed by the driver installation.
•
Driver installation instructions vary slightly depending on your Windows operating
system. To determine your operating system, see MINIMUM SYSTEM
REQUIREMENTS on page 4.
•
Windows XP users: The workstation must be disconnected from your LAN prior to
installation.
•
Administrative privileges for the workstation are needed when installing X26 dataport
software and USB drivers. Contact your department help desk if you receive an
access denied message during installation.
•
This document is intended to provide basic operational instructions for more detailed
information and technical support, contact TASER International at 800-978-2737 or
email us at support@taser.com or view the X26 Download Troubleshooting Guide at
http://www.TASER.com.
•
Downloading and/or saving data from the X26 does not erase the data from the X26
memory. There are no options for users to erase data from the X26 memory.
•
Ensure the computer time and time zone information is correct prior to downloading.
.
IT-INST-X26DPUM-001 Rev: D
October 26, 2006
Page: 2 of 42
This document contains proprietary and confidential information and may not be distributed
to others in any form, without written authorization from TASER International, USA.
This document is for training and reference only. The master copy is controlled in the document library.
X26 Data Port User Manual
TABLE OF CONTENTS
SAFETY PRECAUTIONS ............................................................................................... 4
MINIMUM SYSTEM REQUIREMENTS........................................................................... 4
INSTALLING X26 DATA PORT SOFTWARE ................................................................. 5
INSTALLING USB DRIVERS: WINDOWS 98se, ME, 2000 ............................................ 6
INSTALLING USB DRIVERS: WINDOWS XP ................................................................ 8
CLOCK OPERATION AND INFORMATION ................................................................. 10
DOWNLOADING DATA FROM the X26 ....................................................................... 11
VIEWING A PREVIOUSLY SAVED RECORD.............................................................. 22
UNINSTALLING PREVIOUS VERSIONS OF THE X26 DATAPORT SOFTWARE
AND DRIVERS ................................................................................................... 24
Windows 98se, Me ............................................................................................. 24
UNINSTALLING PREVIOUS VERSIONS OF THE X26 DATAPORT SOFTWARE
AND DRIVERS ................................................................................................... 29
Windows 2000 and Windows XP........................................................................ 29
INSTALLING X26 DATAPORT SOFTWARE FROM THE INTERNET:......................... 34
INSTALLING USB DRIVERS FROM THE INTERNET: WINDOWS 98se, Me, 2000 .... 34
INSTALLING USB DRIVERS FROM THE INTERNET: WINDOWS XP........................ 37
TASER INTERNATIONAL USB DOWNLOADING TROUBLESHOOTING GUIDE....... 40
IT-INST-X26DPUM-001 Rev: D
October 26, 2006
Page: 3 of 42
This document contains proprietary and confidential information and may not be distributed
to others in any form, without written authorization from TASER International, USA.
This document is for training and reference only. The master copy is controlled in the document library.
X26 Data Port User Manual
SAFETY PRECAUTIONS
Prior to Inserting USB cable into the X26, complete the following steps:
1. Ensure that the X26 Safety is in the down (SAFE) position.
2. Remove the TASER Cartridge from the X26.
3. Do not attempt hardware installation if the USB cable is damaged.
MINIMUM SYSTEM REQUIREMENTS
Software Components
Operating System:
Internet Explorer:
Disk Space:
Communications Ports:
Windows 98se/ME/2000/XP with latest Service Pack
Version 5.5 or Higher
100K of available disk space
1 available USB port
Hardware Components
X26 USB Interface Kit
Copyright 2000–2006
TASER International, Inc. All rights reserved.
TASER® is a registered trademark.
TASER International
17800 N. 85th St.
Scottsdale AZ 85255-9603
Internet: http://www.taser.com
Email: support@taser.com
IT-INST-X26DPUM-001 Rev: D
October 26, 2006
Page: 4 of 42
This document contains proprietary and confidential information and may not be distributed
to others in any form, without written authorization from TASER International, USA.
This document is for training and reference only. The master copy is controlled in the document library.
X26 Data Port User Manual
INSTALLING X26 DATA PORT SOFTWARE
1. Close all running programs.
2. Windows XP users, unplug from the LAN. Your network cable is similar to a phone cord
but has a larger jack and a thicker cord.
3. Insert The CD, and after a short delay the setup program will appear. Click Install
Taser X26 Software (Figure 1).
Note: If the X26 installation screen does not appear automatically, click My Computer
and double-click the CD drive titled TASER. If the installation screen still does not
appear, download the software from the TASER Web site or contact customer service
for a replacement CD.
Figure 1
4. Follow the onscreen prompts to complete the software installation.
5. Plug the USB cable into the USB port. Do not insert the USB DPM into the weapon until
the USB driver installation is complete.
6. The USB cable DPM will illuminate red and the FOUND NEW HARDWARE WIZARD
window will appear.
IT-INST-X26DPUM-001 Rev: D
October 26, 2006
Page: 5 of 42
This document contains proprietary and confidential information and may not be distributed
to others in any form, without written authorization from TASER International, USA.
This document is for training and reference only. The master copy is controlled in the document library.
X26 Data Port User Manual
INSTALLING USB DRIVERS: WINDOWS 98SE, ME, 2000
1. Click Next to continue (Figure 2).
Figure 2
2. Select the CD-ROM drives check box, clear all other check boxes, and then click Next
(Figure 3).
Figure 3
IT-INST-X26DPUM-001 Rev: D
October 26, 2006
Page: 6 of 42
This document contains proprietary and confidential information and may not be distributed
to others in any form, without written authorization from TASER International, USA.
This document is for training and reference only. The master copy is controlled in the document library.
X26 Data Port User Manual
3. Click Next (Figure 4).
Figure 4
4. Click Finish to complete the hardware installation (Figure 5).
Figure 5
5. Installation is complete. You can remove the CD.
IT-INST-X26DPUM-001 Rev: D
October 26, 2006
Page: 7 of 42
This document contains proprietary and confidential information and may not be distributed
to others in any form, without written authorization from TASER International, USA.
This document is for training and reference only. The master copy is controlled in the document library.
X26 Data Port User Manual
INSTALLING USB DRIVERS: WINDOWS XP
1. In the Found New Hardware Wizard dialog box, select Install the Software
Automatically (Recommended) and click Next (Figure 6).
Note: If the system displays a prompt asking if you want to connect to the internet for a
suitable driver, select No, not at this time and continue.
Figure 6
2. Select FTDI FT8U2XX Device and click Next (Figure 7).
Figure 7
IT-INST-X26DPUM-001 Rev: D
October 26, 2006
Page: 8 of 42
This document contains proprietary and confidential information and may not be distributed
to others in any form, without written authorization from TASER International, USA.
This document is for training and reference only. The master copy is controlled in the document library.
X26 Data Port User Manual
3. In the Hardware Installation dialog box, click Continue Anyway (Figure 8).
Figure 8
4. Click Finish to complete the hardware installation (Figure 9).
Figure 9
5. Installation is complete. You can remove the CD.
6. Reconnect your network cable (if applicable).
IT-INST-X26DPUM-001 Rev: D
October 26, 2006
Page: 9 of 42
This document contains proprietary and confidential information and may not be distributed
to others in any form, without written authorization from TASER International, USA.
This document is for training and reference only. The master copy is controlled in the document library.
X26 Data Port User Manual
CLOCK OPERATION AND INFORMATION
•
The clock in the X26 is an industry standard clock using a crystal similar to clocks in
other electronic devices. While the clocks are generally reliable, the clock can drift
several minutes per month. This is normal and is inherent in the design of the clock.
The clock is not intended to be extremely accurate similar to an atomic clock.
•
The X26 internal clock is set to Greenwich Mean Time (GMT) only, The download
files will include both GMT and local time..
•
When a download is attempted, the software compares the clock time and the time
zone settings on your computer (Date and Time Properties) to the hour setting in the
weapon. Note: The time zone selected on your computer represents the number of
hours between local time and GMT. For instance, if the computer is set to EST, the
software will look for a 5-hour difference between the hour setting in the weapon and
the hour setting on the computer.
•
The software will then compare the minute setting on your computer and the minute
setting in the weapon.
•
Finally, the software will check to see if you have selected the “Are you currently on
Daylight Savings Time” box on the Welcome page and adjust the hour comparison
accordingly. For instance, in the above example, if the DST box is checked, the
software will look for a four hour difference instead of five.
Note: Selecting the Daylight Savings Time box on the computer has no effect on the
download software. The software only looks at the DST box on the Welcome screen.
•
If the date, hour, or minute comparison does not match (within ±10 minutes), the
software will display a “TIME DISCREPANCY” message.
•
Most often, this is due to the drift of the computer clock. The software will prompt
you to double-check the time and time zone on your computer to ensure that it is
accurate. If the computer time is accurate, the weapon clock may have drifted, or it
might have been synchronized to a different computer with an inaccurate time.
•
TASER International highly recommends using one computer for downloading
unless multiple computers are connected to a network that synchronizes the
computers to minimize the chances of a time discrepancy.
•
The time recorded in the download data log represents the end of the firing cycle,
not when the trigger is pulled. The X26 only records the total duration of each firing,
not each trigger pull. If the trigger is pulled multiple times in one cycle (e.g., double
tapping), this will not be indicated in the download data.
IT-INST-X26DPUM-001 Rev: D
October 26, 2006
Page: 10 of 42
This document contains proprietary and confidential information and may not be distributed
to others in any form, without written authorization from TASER International, USA.
This document is for training and reference only. The master copy is controlled in the document library.
X26 Data Port User Manual
DOWNLOADING DATA FROM THE X26
GENERAL OPERATING NOTES:
•
THE X26 INTERNAL CLOCK IS SET TO GMT (GREENWICH MEAN TIME).
DOWNLOAD FILES WILL INCLUDE BOTH GMT AND LOCAL TIME BASED ON
THE TIME ZONE SETTINGS ON YOUR COMPUTER AND THE DAYLIGHT
SAVINGS TIME. CHECK BOX ON THE X26 WELCOME SCREEN.
•
THE TIME RECORDED IN THE DOWNLOAD DATA LOG REPRESENTS THE END
OF THE FIRING CYCLE, NOT WHEN THE TRIGGER IS PULLED.
•
THE X26 ONLY RECORDS THE TOTAL DURATION OF EACH FIRING, NOT
EACH TRIGGER PULL. IF THE TRIGGER IS PULLED MULTIPLE TIMES IN ONE
CYCLE (E.G. DOUBLE TAPPING), THIS WILL NOT BE INDICATED IN THE
DOWNLOAD DATA.
•
DOWNLOADING AND/OR SAVING DATA FROM THE X26 DOES NOT ERASE
THE DATA FROM THE X26 MEMORY. THERE ARE NO OPTIONS FOR USERS
TO ERASE DATA FROM THE X26 MEMORY.
•
THE FIRST TIME THE DATAPORT DOWNLOAD SOFTWARE IS USED YOU
MUST ENTER THE “DOWNLOADED BY” INFORMATION. THIS INFORMATION
WILL BE STORED FOR ALL SUBSEQUENT USES (Figure 10).
1. Verify that the computer time and time zone information are correct.
2. Click the Taser X26 Dataport desktop icon.
Note: The first time the dataport download software is used, you must enter the
“downloaded by” information. This information will be stored for all subsequent uses
(Figure 10).
3. Insert the USB cable into the computer. The USB DPM will illuminate red if the cable is
connected correctly.
4. Ensure the X26 safety switch is in down (SAFE) position and remove the TASER
Cartridge.
5. Insert the USB DPM into the X26. After a few seconds the USB DPM illumination will
change from red to green and a ‘U’ will appear on the X26 CID. Note: If the cable does
not turn green, remove and reinsert the cable in the computer and X26.
IT-INST-X26DPUM-001 Rev: D
October 26, 2006
Page: 11 of 42
This document contains proprietary and confidential information and may not be distributed
to others in any form, without written authorization from TASER International, USA.
This document is for training and reference only. The master copy is controlled in the document library.
X26 Data Port User Manual
6. Select the Daylight Savings Time zone check box if your time zone is currently on
daylight savings time.
7. Click the Download X26 button (Figure 10).
Figure 10
IT-INST-X26DPUM-001 Rev: D
October 26, 2006
Page: 12 of 42
This document contains proprietary and confidential information and may not be distributed
to others in any form, without written authorization from TASER International, USA.
This document is for training and reference only. The master copy is controlled in the document library.
X26 Data Port User Manual
8. If the ALERT Time Discrepancy dialog box (Figure 11) appears, the date/time on your
computer is not within ±10 minutes of the weapon time. See the CLOCK OPERATION
AND INFORMATION section and perform the following steps. You will not be able to
proceed until resolving the time discrepancy.
Figure 11
a. Check the computer time displayed on the ALERT page. If the computer time is
incorrect, click Change Computer Time to open the Windows Date/Time box
and adjust the time. Proceed to step 9.
b. Check the X26 time displayed on the ALERT page. If the X26 time is incorrect,
click Change X26 Time.
IT-INST-X26DPUM-001 Rev: D
October 26, 2006
Page: 13 of 42
This document contains proprietary and confidential information and may not be distributed
to others in any form, without written authorization from TASER International, USA.
This document is for training and reference only. The master copy is controlled in the document library.
X26 Data Port User Manual
c. A PLEASE CONFIRM dialog box (Figure 12) will appear to verify that you want
to change the time in the X26. Changing the time requires the (case-sensitive)
password located on the CD case. You also can obtain the password by
contacting TASER International Technical Support at 1.800.978.2737.
Figure 12
d. Type the password and click Continue.
Note: Changing the time on the X26 does not change the time stamp on previous firing
records stored in the X26 and both the old (FROM) and new (TO) times are displayed
on the firing record.
IT-INST-X26DPUM-001 Rev: D
October 26, 2006
Page: 14 of 42
This document contains proprietary and confidential information and may not be distributed
to others in any form, without written authorization from TASER International, USA.
This document is for training and reference only. The master copy is controlled in the document library.
X26 Data Port User Manual
9. Select the desired date range or DOWNLOAD ALL FIRING DATA and click Continue
(Figure 13).
Note: If the date range is selected, time change records that overlap dates outside the
range may be inaccurate.
Figure 13
10. The Download Progress dialog box will confirm download progress (Figure 14).
Figure 14
IT-INST-X26DPUM-001 Rev: D
October 26, 2006
Page: 15 of 42
This document contains proprietary and confidential information and may not be distributed
to others in any form, without written authorization from TASER International, USA.
This document is for training and reference only. The master copy is controlled in the document library.
X26 Data Port User Manual
11. The X26 Dataport Download screen provides options for refreshing the weapon time,
viewing, printing and saving data (Figure 15).
Figure 15
Notes:
•
The X26 only records each firing, not each trigger pull. If the trigger is pulled multiple
times in one cycle (double tapping) it will not be indicated on the report.
•
The time recorded in the download data log represents the end of the firing cycle.
•
The temperature is the internal X26 temperature.
•
Time changes provide a log of all changes to the X26 internal clock. If the X26
internal clock has never been updated, this area is blank.
12. There are three options for viewing information: Zoom Out, Print Preview, and Save
Encrypted Record (Figure 15).
IT-INST-X26DPUM-001 Rev: D
October 26, 2006
Page: 16 of 42
This document contains proprietary and confidential information and may not be distributed
to others in any form, without written authorization from TASER International, USA.
This document is for training and reference only. The master copy is controlled in the document library.
X26 Data Port User Manual
13. The Zoom Out option (Figure 15) provides an expanded view of the recorded firing data
and time change records in separate lists (Figure 16).
Figure 16
14. The Print Preview option (Figure 15) provides a preview of printed records in the print
format. A dialog box will appear with the option to combine the time records with the
firings records in one chronological list (Figure 17).
Figure 17
IT-INST-X26DPUM-001 Rev: D
October 26, 2006
Page: 17 of 42
This document contains proprietary and confidential information and may not be distributed
to others in any form, without written authorization from TASER International, USA.
This document is for training and reference only. The master copy is controlled in the document library.
X26 Data Port User Manual
15. A partial screen will appear showing the heading section of the printout. You can scroll
through the entire report if desired (Figure 18).
Figure 18
Note: If the X26 Dataport software cannot download the data associated with a particular
firing cycle, “Incomplete Data” will be displayed under the GMT Time column (Figure 19).
Figure 19
IT-INST-X26DPUM-001 Rev: D
October 26, 2006
Page: 18 of 42
This document contains proprietary and confidential information and may not be distributed
to others in any form, without written authorization from TASER International, USA.
This document is for training and reference only. The master copy is controlled in the document library.
X26 Data Port User Manual
16. Click Print (Figure 15) to print the firing report (Figure 20).
Figure 20
IT-INST-X26DPUM-001 Rev: D
October 26, 2006
Page: 19 of 42
This document contains proprietary and confidential information and may not be distributed
to others in any form, without written authorization from TASER International, USA.
This document is for training and reference only. The master copy is controlled in the document library.
X26 Data Port User Manual
17. The Save Encrypted Record option (Figure 15) stores the record for future access.
The file name defaults to the weapon serial number and may be modified if desired. The
file is saved as an “.x26” file and can only be viewed using the download software
(Figure 21).
Figure 21
18. The Refresh Time option (Figure 15) updates the current time on the download page.
Normally, the time on this screen does not increment while viewing.
19. The Sync Time option (Figure 15) synchronizes the X26 time to the computer time
regardless of the time difference. This feature allows synchronizing the times when the
difference is less than 10 minutes. The Alert Time Synchronization screen will appear
and the instructions are the same as previously described (Figure 22).
20. A PLEASE CONFIRM dialog box will appear to verify that you want to change the time
in the X26. Changing the time requires the (case-sensitive) password located on the CD
IT-INST-X26DPUM-001 Rev: D
October 26, 2006
Page: 20 of 42
This document contains proprietary and confidential information and may not be distributed
to others in any form, without written authorization from TASER International, USA.
This document is for training and reference only. The master copy is controlled in the document library.
X26 Data Port User Manual
case. You also can obtain the password by contacting TASER International Technical
Support at 1.800.978.2737 (Figure 22).
21. Type the password and click Continue.
Note: Changing the time on the X26 does not change the time stamp on previous firing
records stored in the X26 and both the old (FROM) and new (TO) times are displayed
on the firing record.
Figure 22
IT-INST-X26DPUM-001 Rev: D
October 26, 2006
Page: 21 of 42
This document contains proprietary and confidential information and may not be distributed
to others in any form, without written authorization from TASER International, USA.
This document is for training and reference only. The master copy is controlled in the document library.
X26 Data Port User Manual
VIEWING A PREVIOUSLY SAVED RECORD
1. To view a previously saved record, select View Saved Record from the initial program
screen Figure 23).
Figure 23
2. Select the desired file from the appropriate folder (Figure 24).
Figure 24
IT-INST-X26DPUM-001 Rev: D
October 26, 2006
Page: 22 of 42
This document contains proprietary and confidential information and may not be distributed
to others in any form, without written authorization from TASER International, USA.
This document is for training and reference only. The master copy is controlled in the document library.
X26 Data Port User Manual
3. The remainder of the screens function the same as during a download (Figure 25).
Figure 25
IT-INST-X26DPUM-001 Rev: D
October 26, 2006
Page: 23 of 42
This document contains proprietary and confidential information and may not be distributed
to others in any form, without written authorization from TASER International, USA.
This document is for training and reference only. The master copy is controlled in the document library.
X26 Data Port User Manual
UNINSTALLING PREVIOUS VERSIONS OF THE X26 DATAPORT SOFTWARE AND
DRIVERS
Windows 98se, Me
1. Click the Start button (located on the lower left corner of the screen).
2. Click Settings and then click Control Panel (Figure 26).
Figure 26
IT-INST-X26DPUM-001 Rev: D
October 26, 2006
Page: 24 of 42
This document contains proprietary and confidential information and may not be distributed
to others in any form, without written authorization from TASER International, USA.
This document is for training and reference only. The master copy is controlled in the document library.
X26 Data Port User Manual
3. Double-click the Add/Remove Programs icon (Figure 27).
Figure 27
IT-INST-X26DPUM-001 Rev: D
October 26, 2006
Page: 25 of 42
This document contains proprietary and confidential information and may not be distributed
to others in any form, without written authorization from TASER International, USA.
This document is for training and reference only. The master copy is controlled in the document library.
X26 Data Port User Manual
4. Select FTDI USB-to-Serial Converter Drivers (Figure 28).
5. Click the Add/Remove button (Figure 28).
Figure 28
6. Click Continue on the FTDI Uninstaller confirmation panel (Figure 29).
Figure 29
IT-INST-X26DPUM-001 Rev: D
October 26, 2006
Page: 26 of 42
This document contains proprietary and confidential information and may not be distributed
to others in any form, without written authorization from TASER International, USA.
This document is for training and reference only. The master copy is controlled in the document library.
X26 Data Port User Manual
7. Select Finish (Figure 30).
Figure 30
8. Select Taser X26 then click the Add/Remove button (Figure 31).
Figure 31
IT-INST-X26DPUM-001 Rev: D
October 26, 2006
Page: 27 of 42
This document contains proprietary and confidential information and may not be distributed
to others in any form, without written authorization from TASER International, USA.
This document is for training and reference only. The master copy is controlled in the document library.
X26 Data Port User Manual
9. Click Yes on the Uninstalling Taser X26 confirmation panel (Figure 32) and click OK
when the uninstall is finished (Figure 33).
Figure 32
Figure 33
IT-INST-X26DPUM-001 Rev: D
October 26, 2006
Page: 28 of 42
This document contains proprietary and confidential information and may not be distributed
to others in any form, without written authorization from TASER International, USA.
This document is for training and reference only. The master copy is controlled in the document library.
X26 Data Port User Manual
UNINSTALLING PREVIOUS VERSIONS OF THE X26 DATAPORT SOFTWARE AND
DRIVERS
Windows 2000 and Windows XP
1. Click the Start button (located on the lower left corner).
2. Click Settings and then click Control Panel (Figure 34).
Figure 34
IT-INST-X26DPUM-001 Rev: D
October 26, 2006
Page: 29 of 42
This document contains proprietary and confidential information and may not be distributed
to others in any form, without written authorization from TASER International, USA.
This document is for training and reference only. The master copy is controlled in the document library.
X26 Data Port User Manual
3. Double click the Add/Remove Programs icon (Figure 35).
.
Figure 35
4. Click the “Change/Remove” button (Figure 36).
Figure 36
IT-INST-X26DPUM-001 Rev: D
October 26, 2006
Page: 30 of 42
This document contains proprietary and confidential information and may not be distributed
to others in any form, without written authorization from TASER International, USA.
This document is for training and reference only. The master copy is controlled in the document library.
X26 Data Port User Manual
5. Click Change/Remove in the FTDI USB Serial Converter Drivers section. (Figure 37).
Figure 37
6. Click Continue on the FTDI Uninstaller confirmation panel (Figure 38).
Figure 38
IT-INST-X26DPUM-001 Rev: D
October 26, 2006
Page: 31 of 42
This document contains proprietary and confidential information and may not be distributed
to others in any form, without written authorization from TASER International, USA.
This document is for training and reference only. The master copy is controlled in the document library.
X26 Data Port User Manual
7. Click Finish on the FTDI Uninstaller confirmation panel (Figure 39).
Figure 39
8. Select Taser X26 on the Remove Programs page (Figure 40).
Figure 40
IT-INST-X26DPUM-001 Rev: D
October 26, 2006
Page: 32 of 42
This document contains proprietary and confidential information and may not be distributed
to others in any form, without written authorization from TASER International, USA.
This document is for training and reference only. The master copy is controlled in the document library.
X26 Data Port User Manual
9. Click Yes on the Uninstalling Taser X26 confirmation panel (Figure 41).
Figure 41
10. Click OK when the uninstall is finished (Figure 42).
Figure 42
IT-INST-X26DPUM-001 Rev: D
October 26, 2006
Page: 33 of 42
This document contains proprietary and confidential information and may not be distributed
to others in any form, without written authorization from TASER International, USA.
This document is for training and reference only. The master copy is controlled in the document library.
X26 Data Port User Manual
INSTALLING X26 DATAPORT SOFTWARE FROM THE INTERNET:
1. Go to http://www.taser.com/. Click the LAW ENFORCEMENT button, click Support on
the left side of the page, and click the USB Dataport download link.
2. Click “USB Dataport (current version)” to download “setup.zip” to your desktop.
3. Close all running programs.
4. Windows XP users must unplug the computer from the network (LAN). Your network
cable is similar to a phone cord but has a larger jack and thicker cord.
5. Double-click the setup.zip file on your desktop.
6. Double-click the setup.exe file and the installation program will begin.
7. Follow the on screen prompts to complete the software installation.
8. Plug the USB cable into the USB port. Do not insert the USB DPM into the weapon until
the USB driver installation is complete.
9. The USB cable DPM will illuminate red and the FOUND NEW HARDWARE WIZARD
window will appear.
INSTALLING USB DRIVERS FROM THE INTERNET: WINDOWS 98SE, ME, 2000
1. Click Next to continue (Figure 43).
Figure 43
IT-INST-X26DPUM-001 Rev: D
October 26, 2006
Page: 34 of 42
This document contains proprietary and confidential information and may not be distributed
to others in any form, without written authorization from TASER International, USA.
This document is for training and reference only. The master copy is controlled in the document library.
X26 Data Port User Manual
2. Check the Specify a Location box, uncheck all other boxes, and then click Next
(Figure 44).
Figure 44
3. In the Found New Hardware Wizard dialog box, click the Copy manufacturer’s files
text box.
a. Type the following line into the text box:
C:\Program Files\Taser X26\X26 Usb Drivers
Figure 45
b. Click OK (Figure 45).
IT-INST-X26DPUM-001 Rev: D
October 26, 2006
Page: 35 of 42
This document contains proprietary and confidential information and may not be distributed
to others in any form, without written authorization from TASER International, USA.
This document is for training and reference only. The master copy is controlled in the document library.
X26 Data Port User Manual
4. Click Finish to complete hardware installation Figure 46).
Figure 46
5. Proceed to the DOWNLOADING DATA FROM the X26 section on page 11.
IT-INST-X26DPUM-001 Rev: D
October 26, 2006
Page: 36 of 42
This document contains proprietary and confidential information and may not be distributed
to others in any form, without written authorization from TASER International, USA.
This document is for training and reference only. The master copy is controlled in the document library.
X26 Data Port User Manual
INSTALLING USB DRIVERS FROM THE INTERNET: WINDOWS XP
1. In the Found New Hardware Wizard dialog box, select Install from a list or specific
location (Advanced) and click Next (Figure 47).
Note: If the system displays a prompt asking if you want to connect to the internet for a
suitable driver, select No, not at this time and continue.
Figure 47
IT-INST-X26DPUM-001 Rev: D
October 26, 2006
Page: 37 of 42
This document contains proprietary and confidential information and may not be distributed
to others in any form, without written authorization from TASER International, USA.
This document is for training and reference only. The master copy is controlled in the document library.
X26 Data Port User Manual
2. Select Search for the best driver in these locations and select the Include this
location in the search check box.
a. Type the following line into the text box:.
C:\Program Files\Taser X26\X26 Usb Drivers
b. Click Next (Figure 48).
Figure 48
3. In the Hardware Installation dialog box, click Continue Anyway (Figure 49).
Figure 49
IT-INST-X26DPUM-001 Rev: D
October 26, 2006
Page: 38 of 42
This document contains proprietary and confidential information and may not be distributed
to others in any form, without written authorization from TASER International, USA.
This document is for training and reference only. The master copy is controlled in the document library.
X26 Data Port User Manual
4. Click Finish to complete the hardware installation (Figure 50).
Figure 50
5. Reconnect your network cable (if applicable).
6. Proceed to the DOWNLOADING DATA FROM the X26 section on page 11.
IT-INST-X26DPUM-001 Rev: D
October 26, 2006
Page: 39 of 42
This document contains proprietary and confidential information and may not be distributed
to others in any form, without written authorization from TASER International, USA.
This document is for training and reference only. The master copy is controlled in the document library.
X26 Data Port User Manual
TASER INTERNATIONAL USB DOWNLOADING TROUBLESHOOTING GUIDE
When the USB cable is plugged into the computer, the USB DPM does
not illuminate red.
OR
Symptom
When the USB cable is plugged into the X26, the USB DPM does not
change from red to green and/or the X26 CID does not display a "U".
Verify the USB/X26 device is connected and that the X26 is powered up.
Possible Cause The USB DPM cable may be damaged or a good connection might not
have been made between the X26 and the USB DPM.
Disconnect the USB DPM from the weapon and the computer. Wait a
few seconds and reattach the USB DPM to the computer and then to the
Remedy
X26. If the problem persists, please contact TASER customer support at
800-978-2737.
Removed CD before completing the driver installation.
OR
Symptom
When the X26 Dataport Download software starts one of the following
error messages is displayed: “Error: Can't load USB device driver.”
or “FT_OPEN is not valid.”
The driver installation was unsuccessful or was not performed during
Possible Cause
installation.
Please refer to the X26 Dataport Download user’s manual or contact
TASER customer support at 800-978-2737 for help with correct driver
Remedy
installation.
When “Download X26” is selected the following error message appears:
“USB device and/or X26 not found.”
Verify the USB/X26 device is connected and that the X26 is powered up.
The USB DPM cable may be damaged or a good connection might not
Possible Cause
have been made between the X26 and the USB DPM. Or, the driver
installation was unsuccessful or was not performed during installation.
Disconnect the USB DPM from the weapon and the computer. Wait a
few seconds and reattach the USB DPM to the computer and then to the
X26. If the problem persists, please refer to the X26 Dataport Download
Remedy
user’s manual or contact TASER customer support at 800-978-2737 for
help with correct driver installation.
Symptom
IT-INST-X26DPUM-001 Rev: D
October 26, 2006
Page: 40 of 42
This document contains proprietary and confidential information and may not be distributed
to others in any form, without written authorization from TASER International, USA.
This document is for training and reference only. The master copy is controlled in the document library.
X26 Data Port User Manual
Department/company policy prohibits disconnecting the computer from
the network (LAN). This applies to Windows XP users only.
Windows XP users must disconnect from the LAN to prevent the
Possible Cause Windows software from attempting to find software drivers on the
internet.
The LAN cable is typically blue, and is connected to the computer with a
jack similar to a standard phone jack. Contact your computer support
personnel if unable to determine the proper cable. If department policy
Remedy
prohibits disconnecting the computer from the LAN, contact TASER
customer support for Tech Support on installing drivers using an
alternative procedure.
Symptom
When I “zoom out” to view firing records, it appears that some sequence
numbers are missing.
This is not an error. The sequence numbers are chronological, and each
firing record requires a separate sequence number. In addition, each
Possible Cause
time change requires two sequence numbers – FROM and TO. Missing
numbers in the firing record correspond to time change records.
Select the “Print Preview” option, and then select “Yes” to combine time
changes and firing records into one sequential display. This format will
Remedy
show all sequence numbers in chorological order.
Symptom
When I load, print, and view previously saved records, the X26 weapon
software version number on the printout indicates OO.
For X26 Dataport Download software versions before 15.5, the weapon
Possible Cause
software version is not saved with the download file.
Upgrade to the current X26 Dataport Download software version
available on the TASER International web site or from TASER
Remedy
International customer support.
Symptom
The “Time Discrepancy” dialog is displayed.
The computer clock and the weapon internal clock differ by more than
Possible Cause 10 minutes. Most likely, the computer clock time is wrong, or the
computer time zone is incorrect.
Follow the on screen prompts to change computer time or time zone. If
computer time and time zone are correct, select “Change X26 Time” to
change the X26 internal clock. A password is required to change the
Remedy
weapon clock and can be obtained from your administrator or by
contacting TASER customer support at 800-978-2737.
Symptom
IT-INST-X26DPUM-001 Rev: D
October 26, 2006
Page: 41 of 42
This document contains proprietary and confidential information and may not be distributed
to others in any form, without written authorization from TASER International, USA.
This document is for training and reference only. The master copy is controlled in the document library.
X26 Data Port User Manual
Data could not be written to this memory location and was therefore
moved to the next available location.
A corruption occurred during the firing cycle that prevented the software
Possible Cause
from recording the firing record.
There is no correction available for this problem. Other records are not
Remedy
affected, and new data will be recorded normally.
Symptom
The “Error: Time Still Not in Sync” dialog is displayed after attempting to
synchronize the X26 internal clock.
A good connection might not have been made between the X26 and the
Possible Cause USB DPM or between the USB cable and the computer and/or an older
version of the dataport download software is being used.
Disconnect the USB DPM from the weapon and the computer. Wait a
few seconds and reattach the USB DPM to the computer and then to the
X26. Upgrade to the current X26 Dataport Download software version
Remedy
available on the TASER International web site or from TASER
International customer support. If the problem persists, please contact
TASER International customer support at 800-978-2737.
Symptom
When I click the print button on the “Print Preview” page, nothing
happens or the dataport download program and /or Windows locks up.
All available updates for Windows have not been installed from
Possible Cause
Microsoft.
Connect to the internet and connect to
http://windowsupdate.microsoft.com. Download and install all available
Remedy
updates for Windows. This may require administrative privileges and if
unable to install updates, contact your computer support personnel.
Symptom
IT-INST-X26DPUM-001 Rev: D
October 26, 2006
Page: 42 of 42
This document contains proprietary and confidential information and may not be distributed
to others in any form, without written authorization from TASER International, USA.
This document is for training and reference only. The master copy is controlled in the document library.